Join the fastest growing Craft community on Pinterest!
It all began with a little problem that turned into something unexpectedly heartwarming. I wanted to teach my kids the joy of giving through a Secret Santa activity, but with a twist.
The rule? All gifts had to come from the Dollar Store. That’s when I spotted the perfect material: a stack of soft socks. Suddenly, the idea hit me:
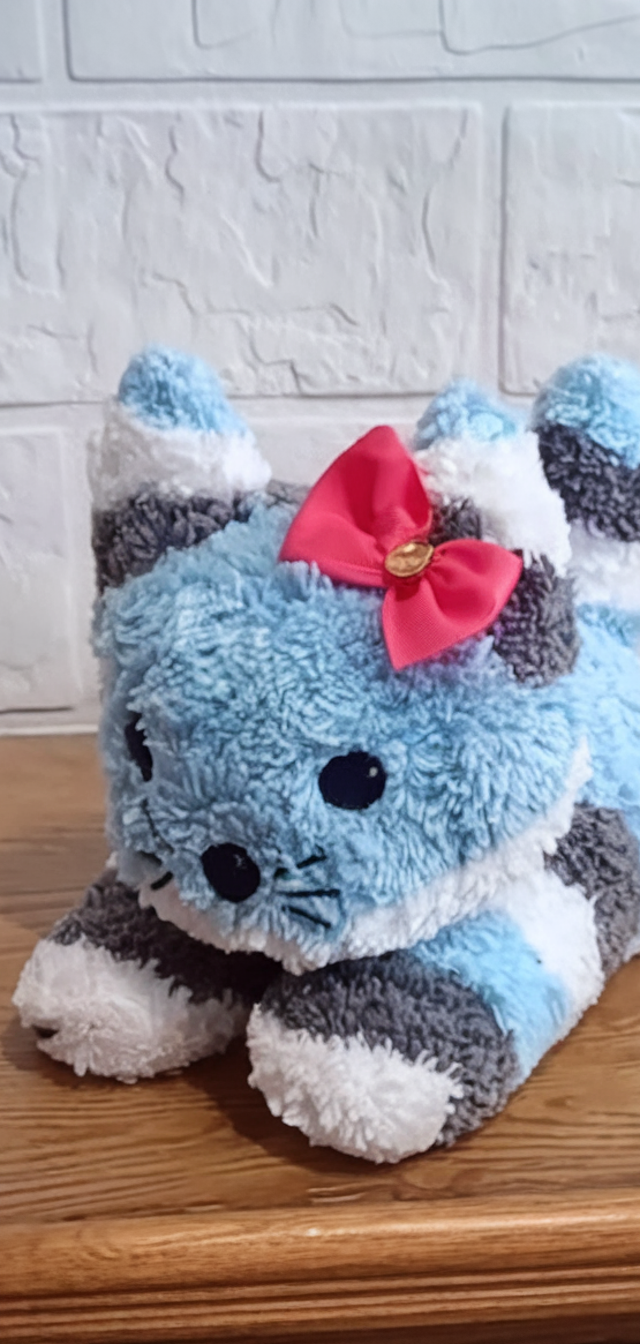
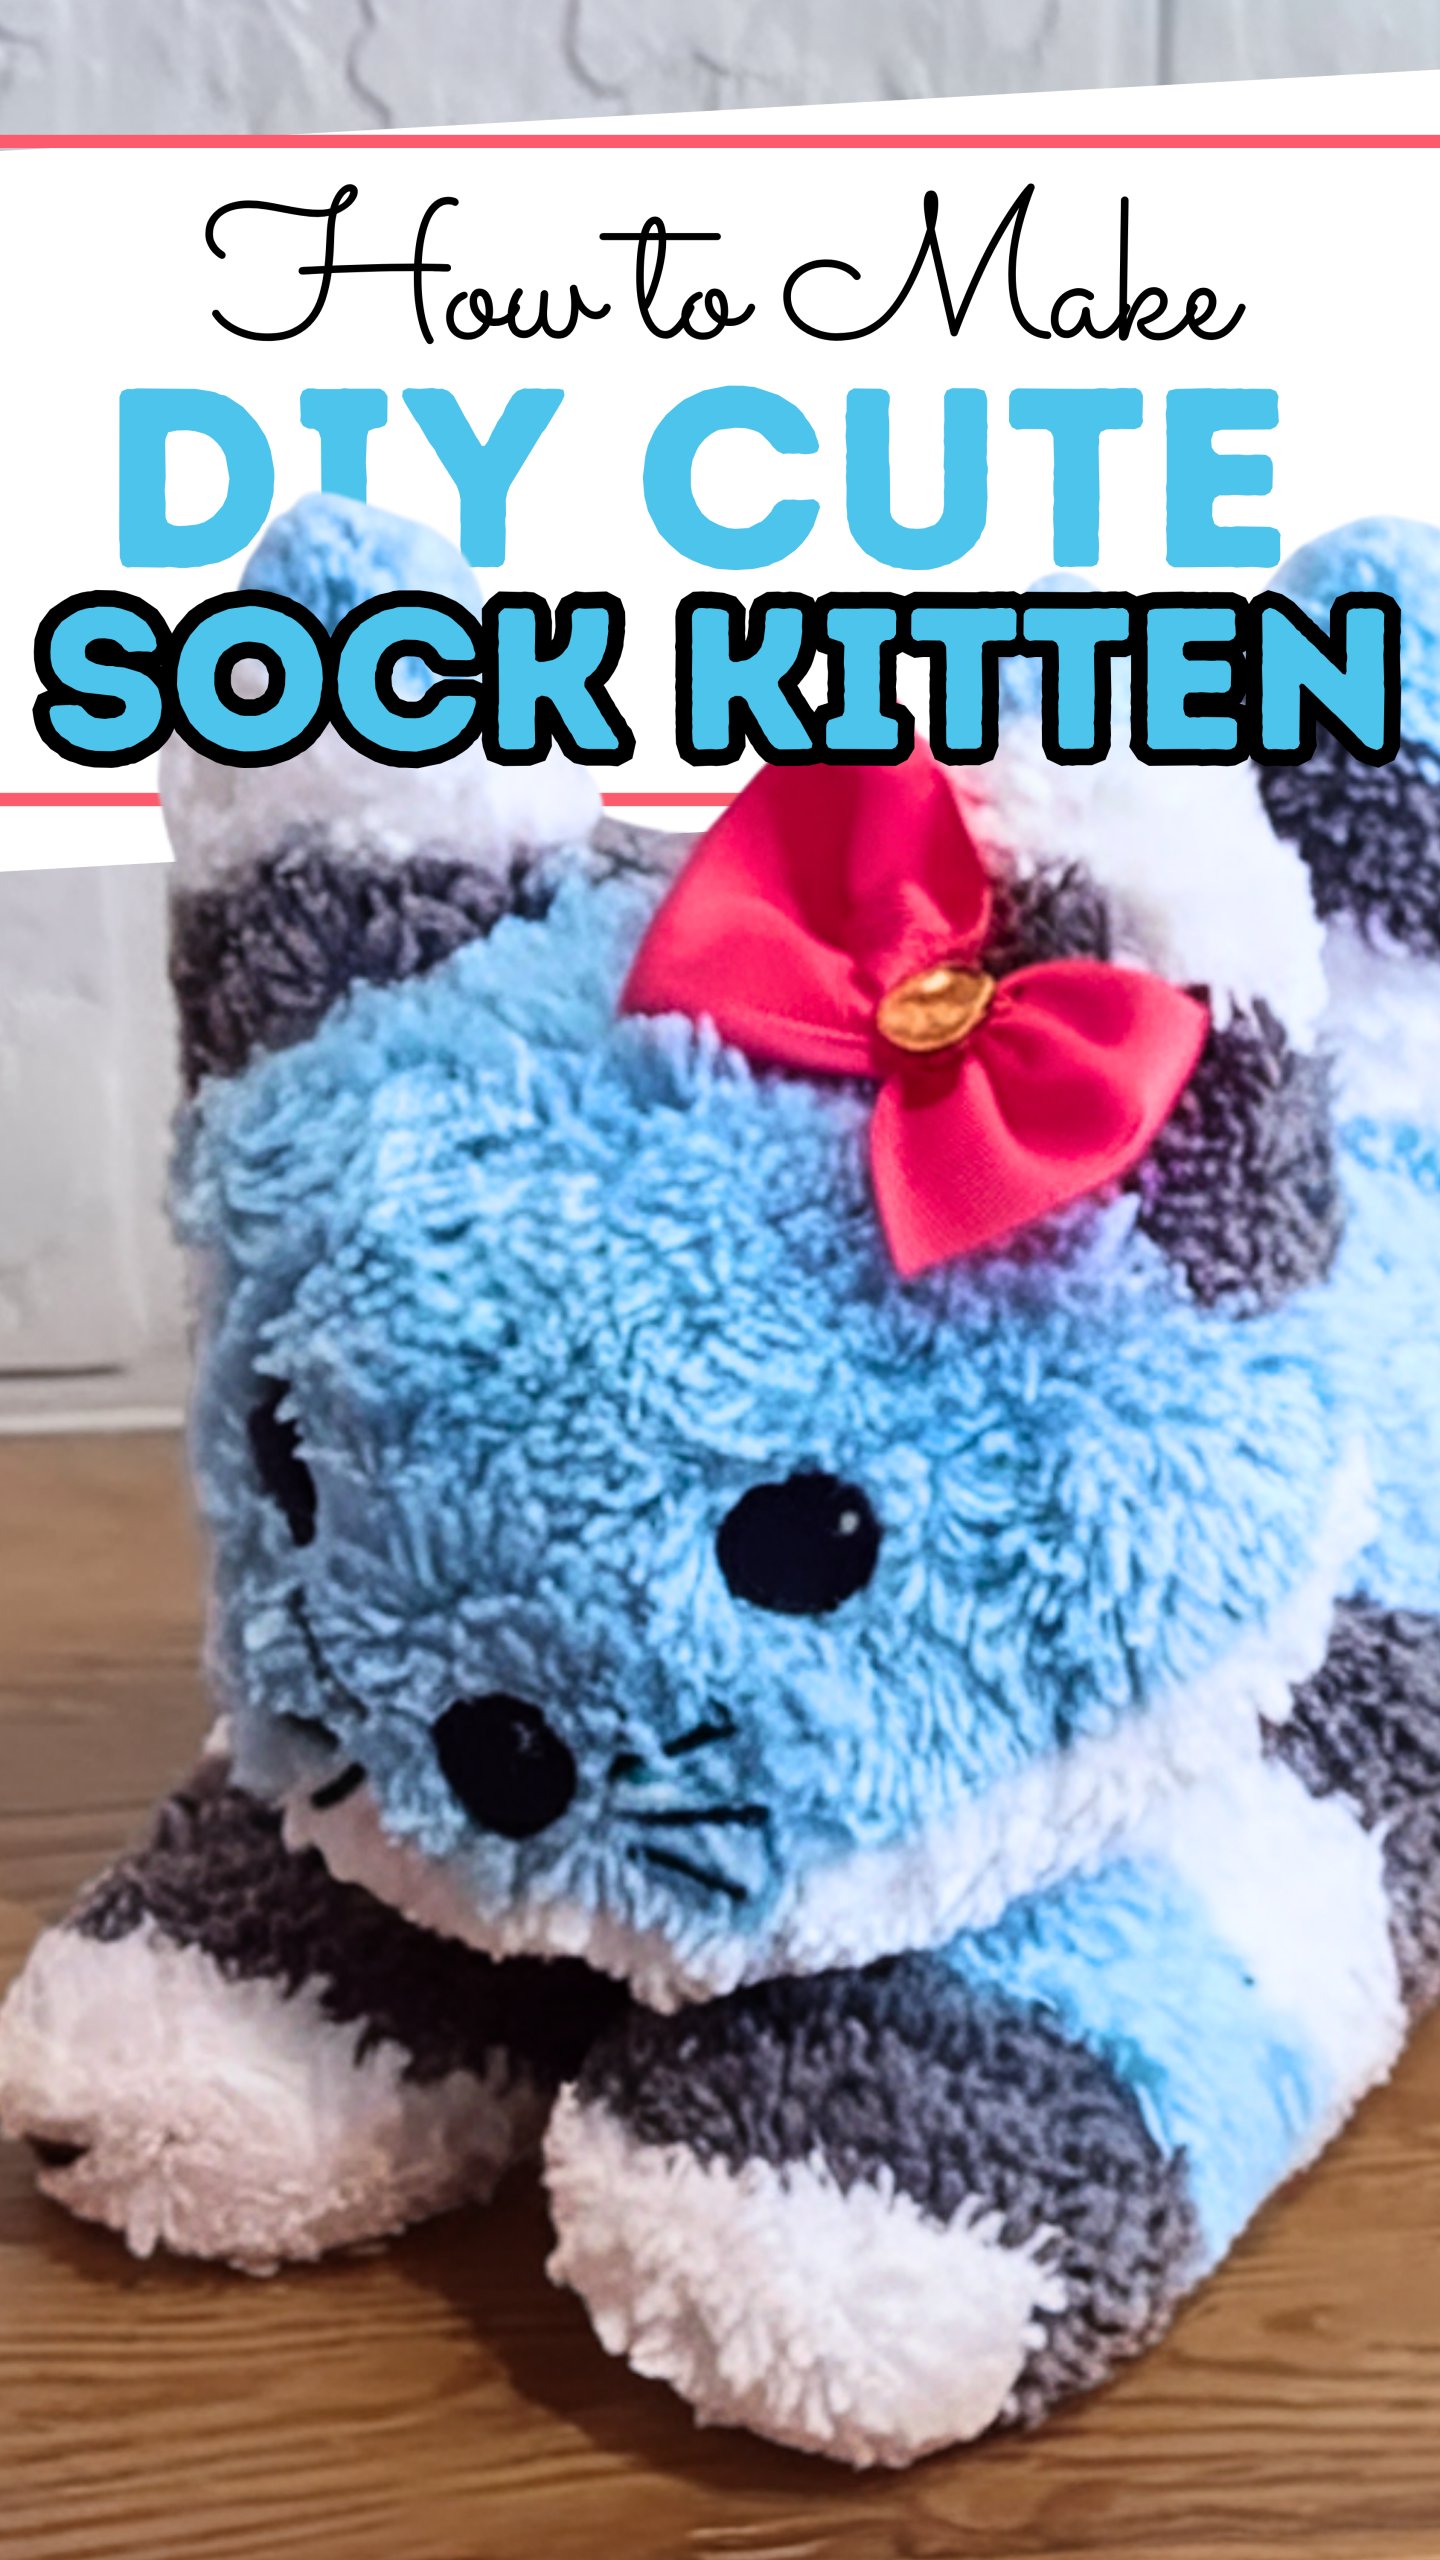
I wouldn’t just buy a gift for my daughter (an animal lover); I’d make her something truly special: a sock kitten! It was affordable and absolutely adorable.
Since then, it’s become one of our favorite handmade gifts, right up there with the clay pins I show how to make in another article on my blog.
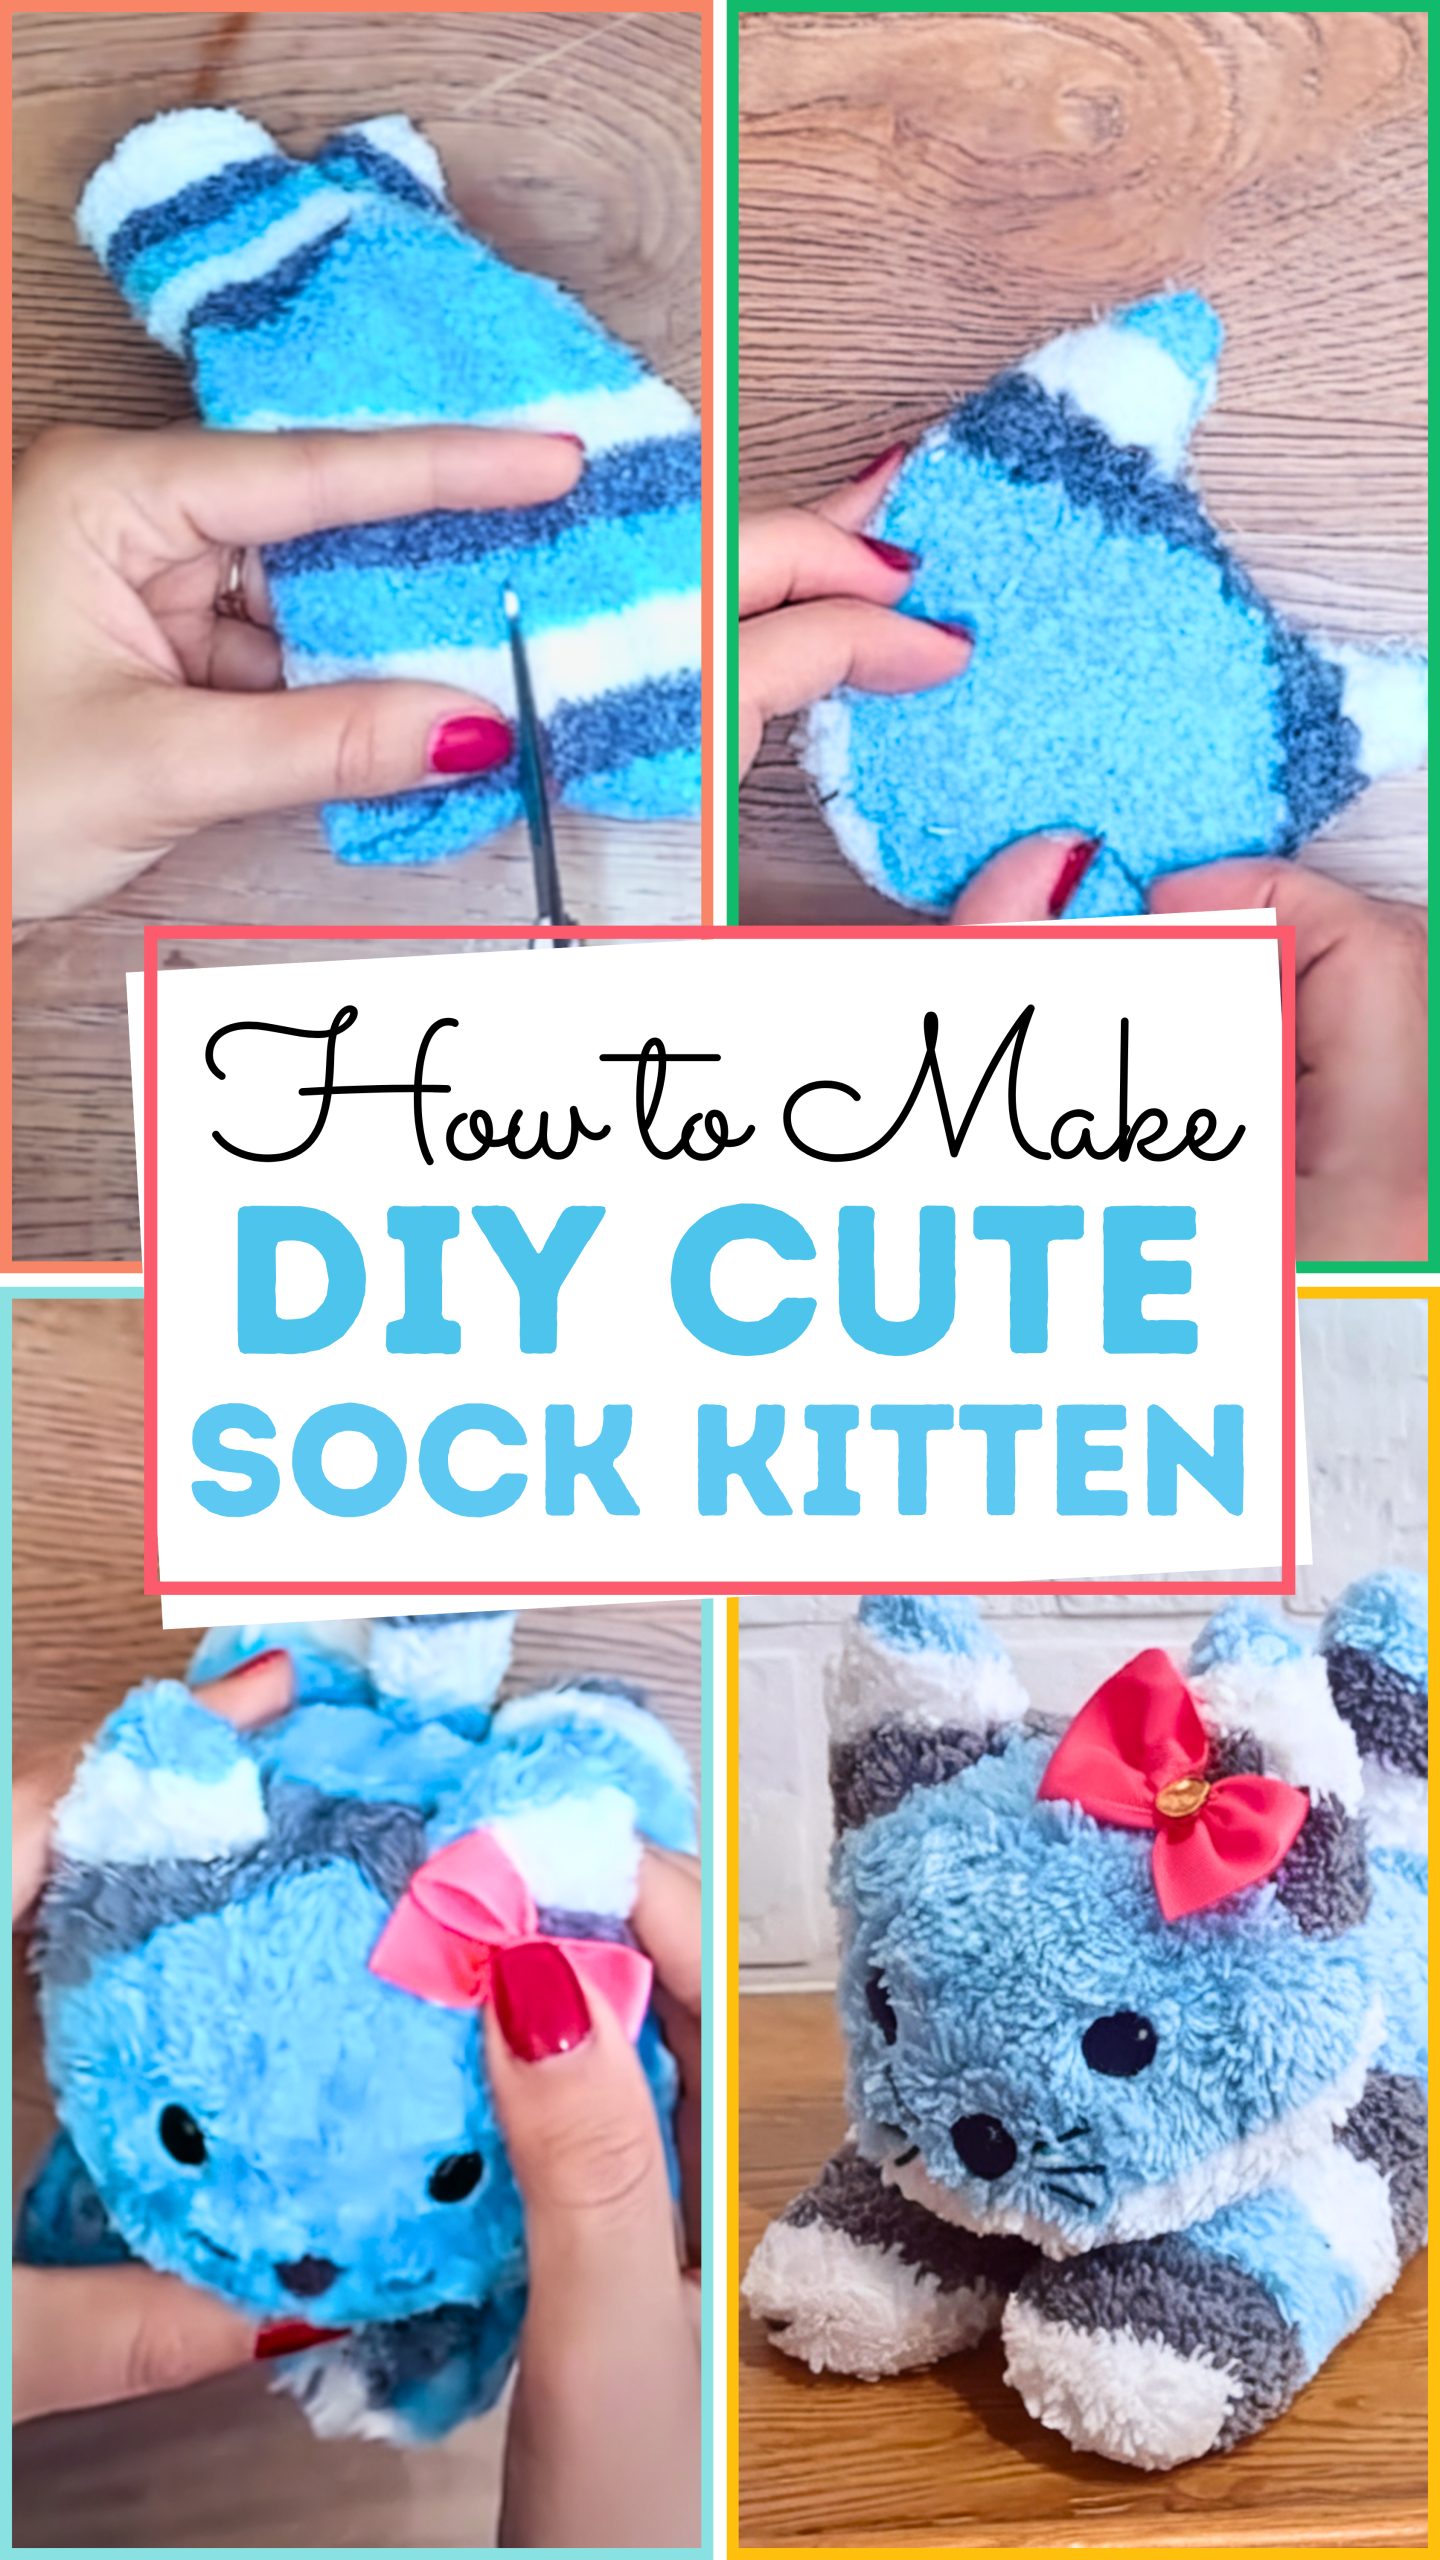
Creating this sock kitten turned out to be a little adventure in creativity. The best part? You don’t need a sewing machine, just a simple needle and thread, a clean sock (crew or ankle), poly-fill stuffing, scissors, a few buttons or googly eyes, and a little imagination.
I also used a scrap of white felt to give the eyes a cute backing and ribbon for a finishing touch. After sketching out the head, body, and tail on the sock and carefully cutting the shapes, I hand-stitched everything together.
My daughter was completely in awe when she realized that her soft, cuddly kitten was handmade from socks she’d probably seen in our laundry basket not long ago!
The moment she hugged her new sock kitten, I knew I’d stumbled onto something magical. It wasn’t just a toy; it was a memory. A craft filled with love, laughter, and the spirit of giving.
Whether you’re looking for a sweet birthday present, a handmade gift, or a fun project to enjoy with the kids, this DIY is perfect. And if you’re hooked on creative crafts like this one.
Don’t forget to check out my article on how to make a beautiful clay pin, another easy DIY that pairs beautifully with your sock kitten in a gift box. After all, nothing says “I care” like something made by hand.
Materials Needed
- One sock (a clean crew or ankle sock works best)
- Poly-fill stuffing or fabric scraps
- Needle & thread (matching color)
- Buttons or googly eyes
- Optional: scrap of white felt for eye backing
- Scissors
- Pins or clothespins to hold while sewing
How To Make DIY Cute Sock Kitten
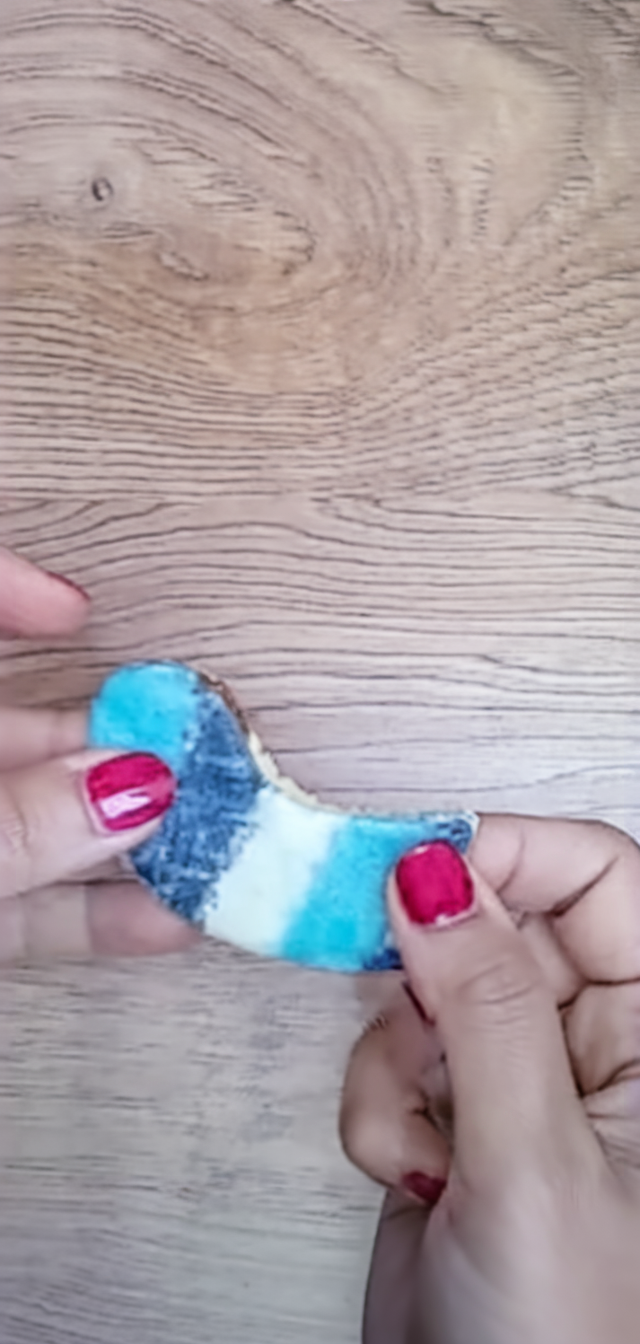
Step 1: Cut Sock for Body & Ears
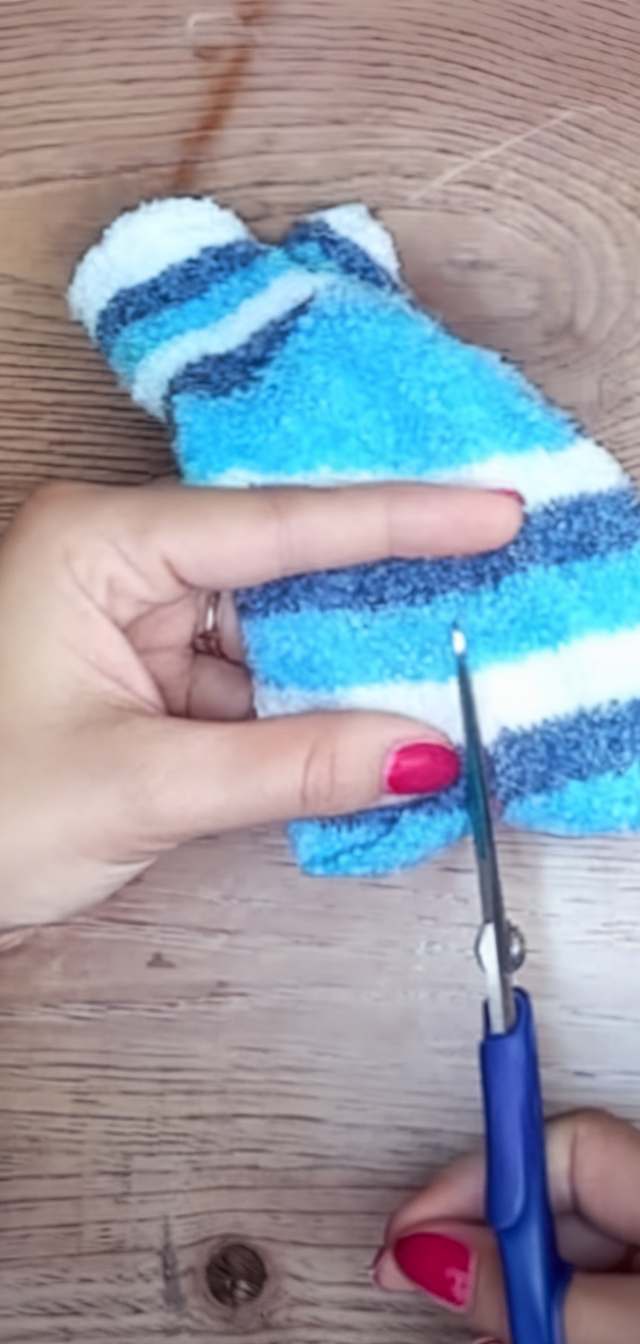
Turn the sock inside out and flatten the toe area. Draw a “U” shape marking where the kitten’s ears will be, about 1″ down from the tip. Cut along the line carefully, leaving a seam line for stitching.
Step 2: Stitch the Ear Shape
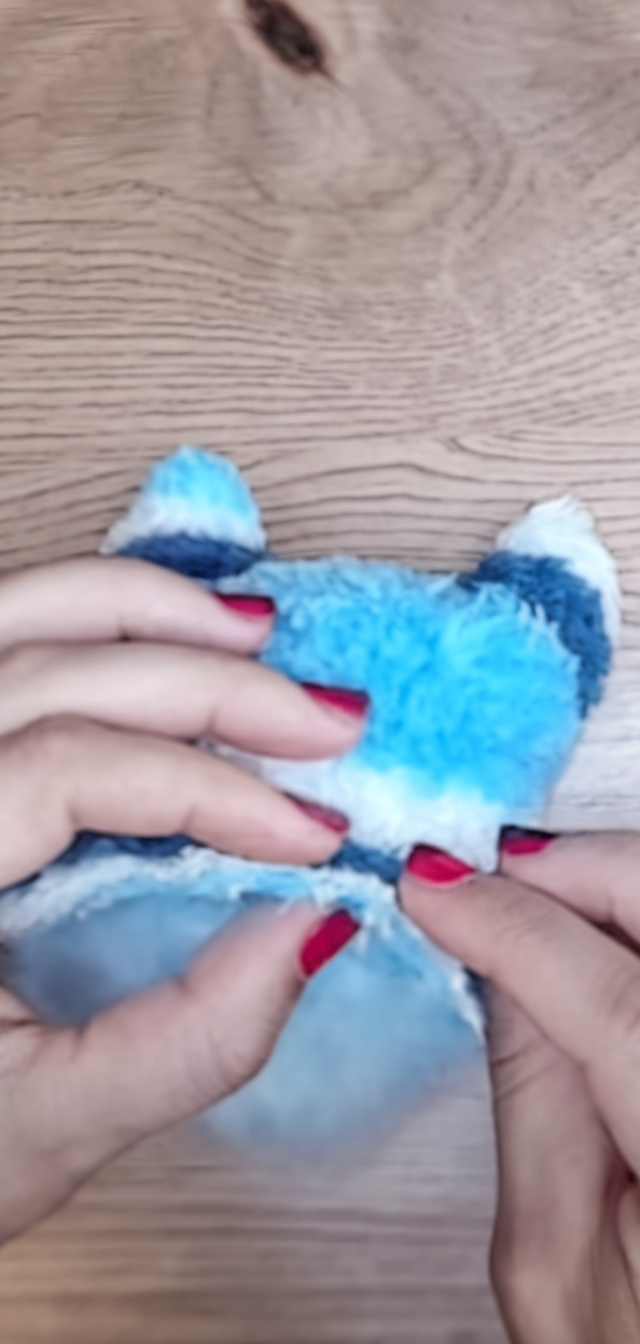
Using small running stitches, sew along the “U” shape to form the ears. Reinforce by backtacking at both ends. Then cut out the center inside the stitch line to define ear shapes.
Step 3: Stuff the Ears & Head
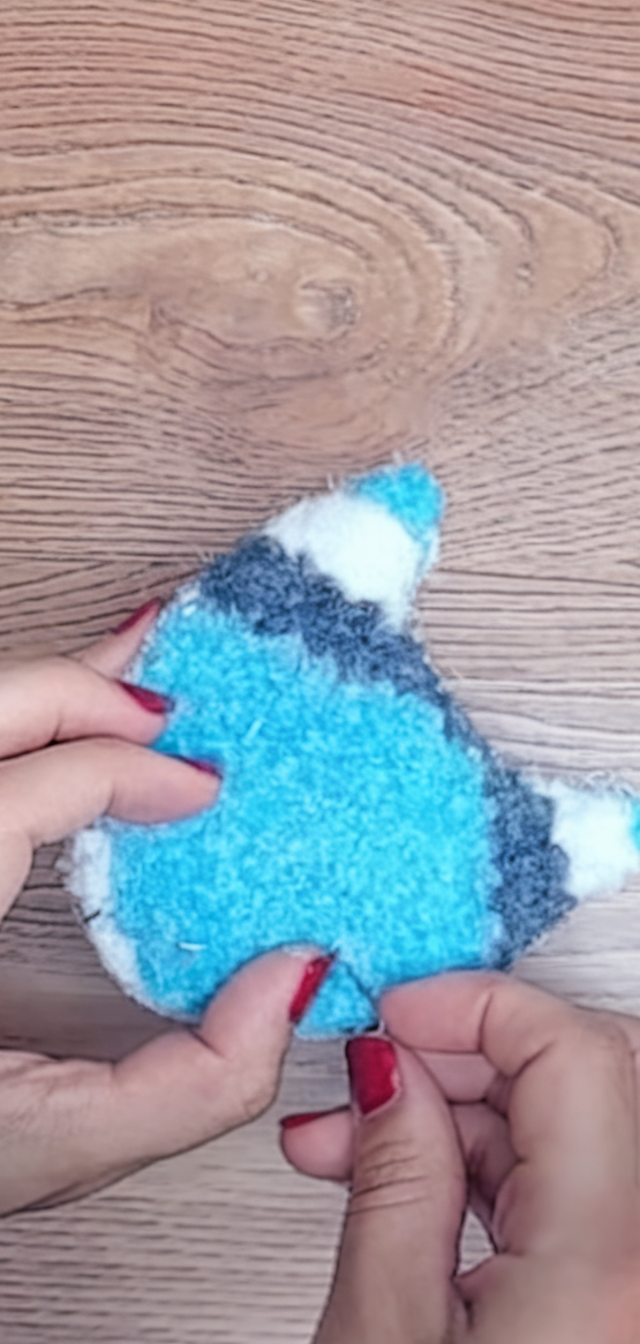
Turn the sock right-side out. Push pins at the ear bases to prevent stuffing overflow, then stuff the ears stiffly and fill the head about halfway.
Step 4: Define the Neck
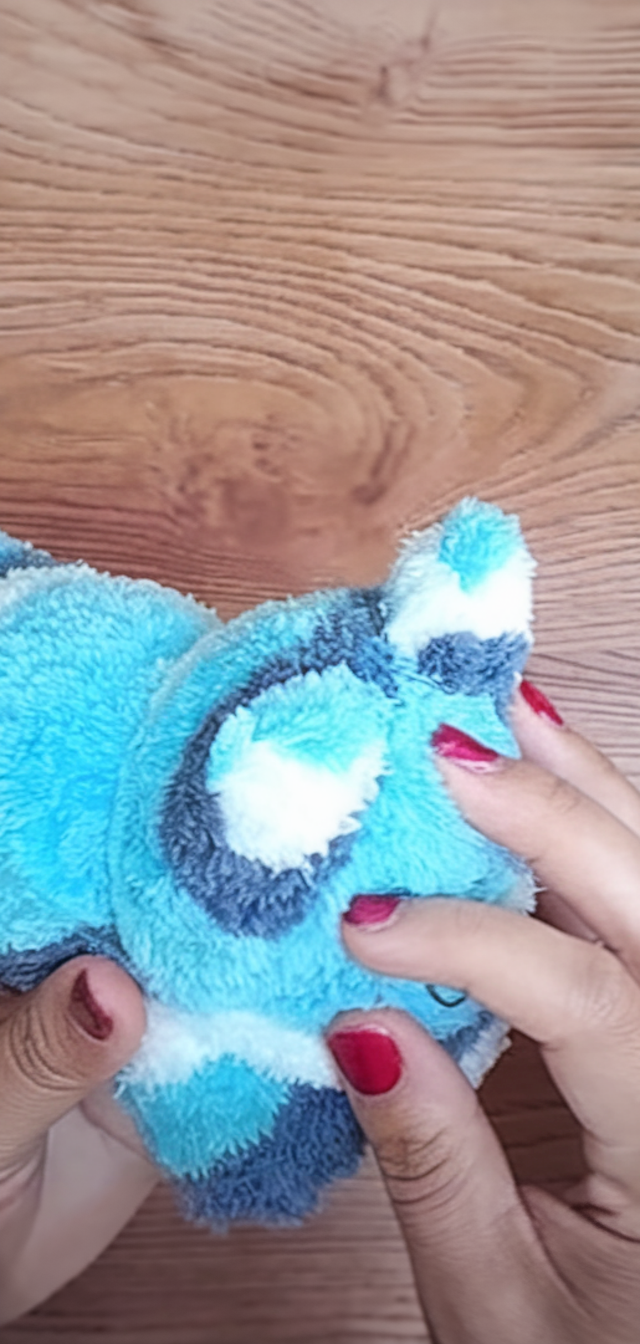
Thread a needle and run a stitch around the base of the head. Pull tight to cinch in a neck; knot securely. Continue stuffing the body, then close the bottom opening using a slip stitch.
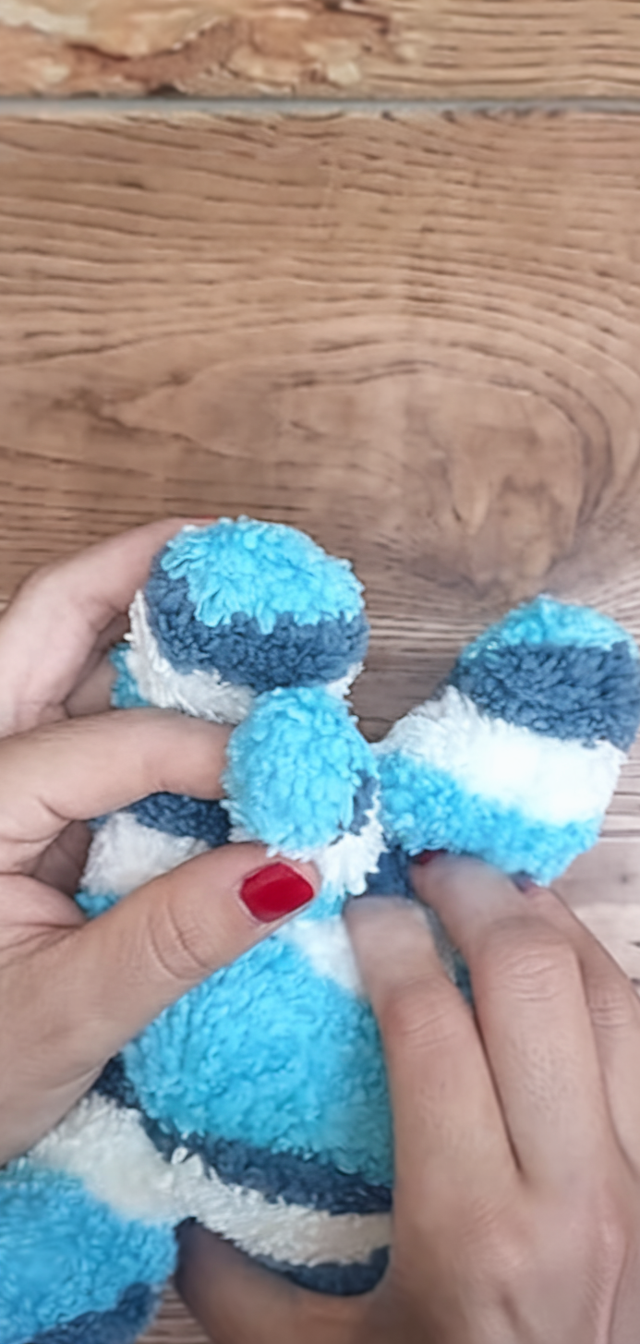
Step 5: Shape Ears & Legs
Add vertical stitches on the ears to create definition. For front legs, mark three vertical pin lines below the neck. Stitch down through stuffing and back up to define paws and legs.
Step 6: Sew On Face
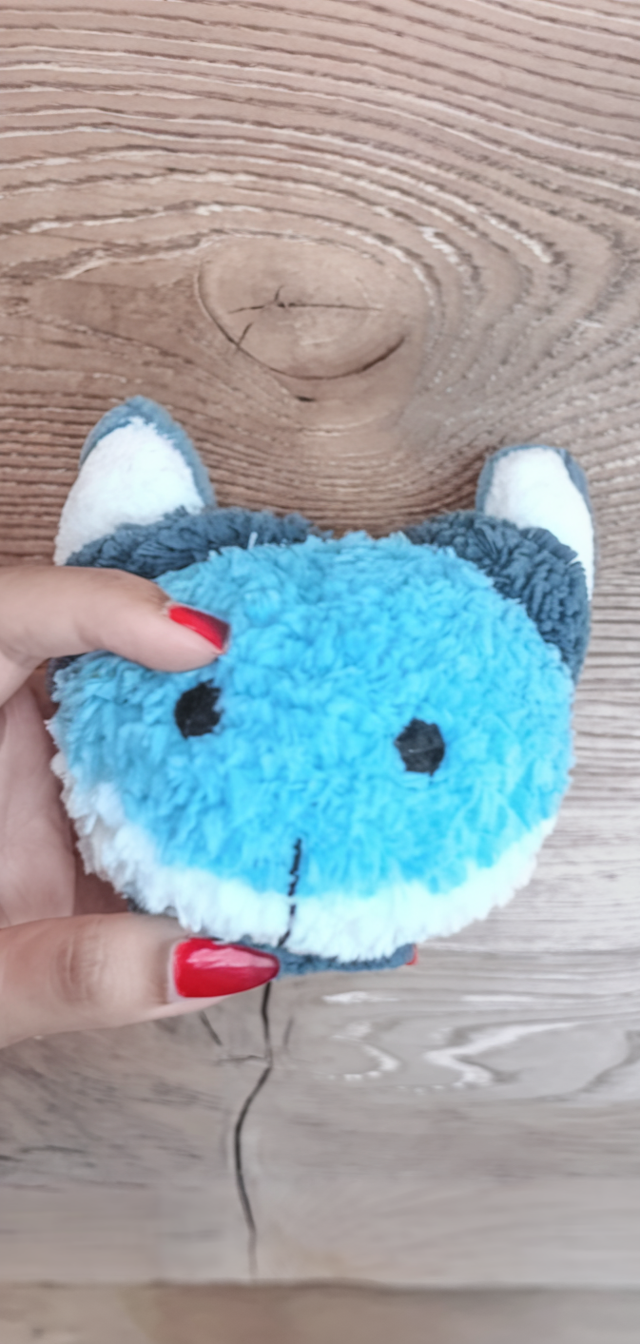
Pin the eyes and nose placement, typically two eyes with a nose in between. Attach eyes using buttons (with white felt backing) and stitch the nose tightly so the features sit snugly into the plush face.
Step 7: Create Back Legs & Tail (Optional)
Use the sock’s heel section to form back paws. For added fun, use sock scraps to make a tail, stuffing and attaching it with secure stitches.
Step 8: Final Fluff & Finish
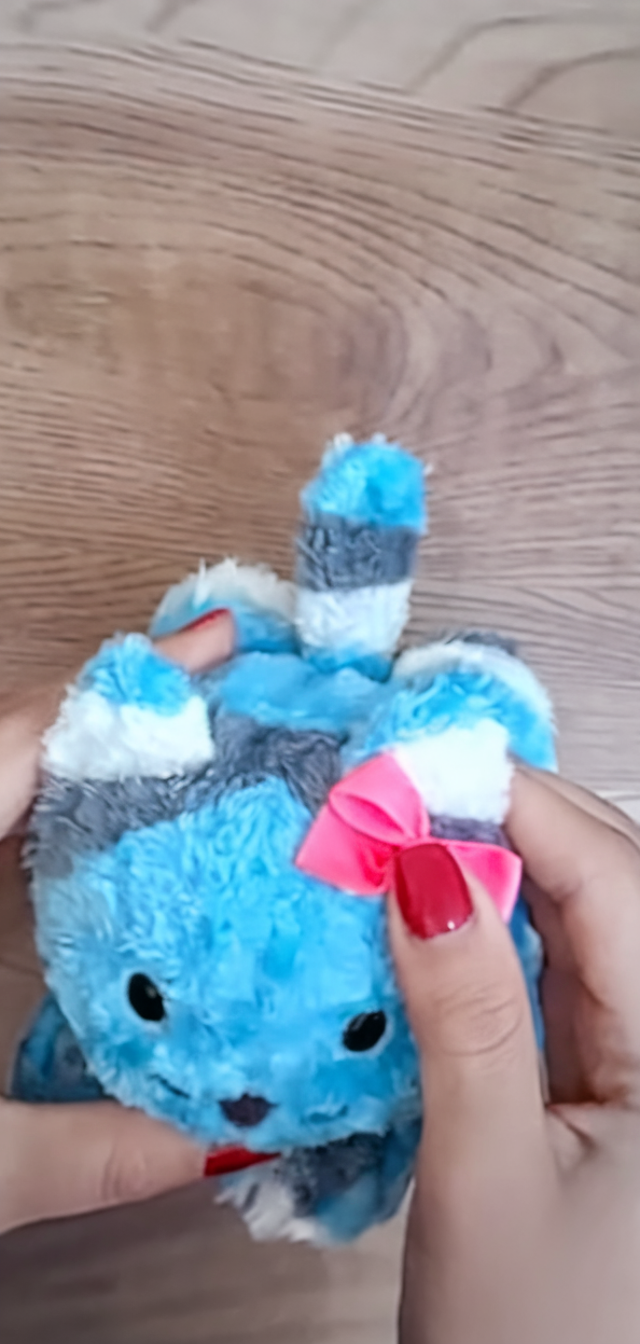
Shape the sock kitten, fluff stuffing through seams if needed, and trim any loose threads. Add whiskers with black thread if desired.
Sock Kitten Pro Tips
- Cotton socks are more forgiving for beginner stitching.
- Use clothespins or pins to hold layers together; they make precise seams easier.
- Stuff firmly but not so much that the fabric stretches out of shape.
- Try striped or patterned socks for special character; matching stripes at the face can be charming.
FAQs
Is this Sock Kitten suitable for beginners?
Yes, use only basic hand stitches and forgiving fabric.
Can I use a new sock instead of recycling?
Absolutely.
What can I use instead of poly-fill?
Fabric scraps or sock cuttings work great and add a bit more weight for a squishy feel for your sock kitten.
How do I add whiskers?
Use black embroidery thread or fine yarn sewn lightly onto the face after stitches are hidden.
Can I make different sock animals?
Yes.
Conclusion
This DIY Cute Sock Kitten project is a blend of upcycling and simple sewing. With just one sock and a few minutes, your kids can create their very own plush kitten friend.