Join the fastest growing Craft community on Pinterest!
I was focused on crafting one weekend, and I just finished writing my post on how to make a cute sock kitten at home when I realized I wanted to try something new, something that didn’t need too much effort. Obviously, I try my hand to weave as I’ve always loved the way it looked.
The problem? I didn’t have a loom, and every tutorial I saw looked way too complicated. That’s when I found a video that used just drinking straws, some yarn, and tape. Weave with straws? I was surprised but curious enough to try.
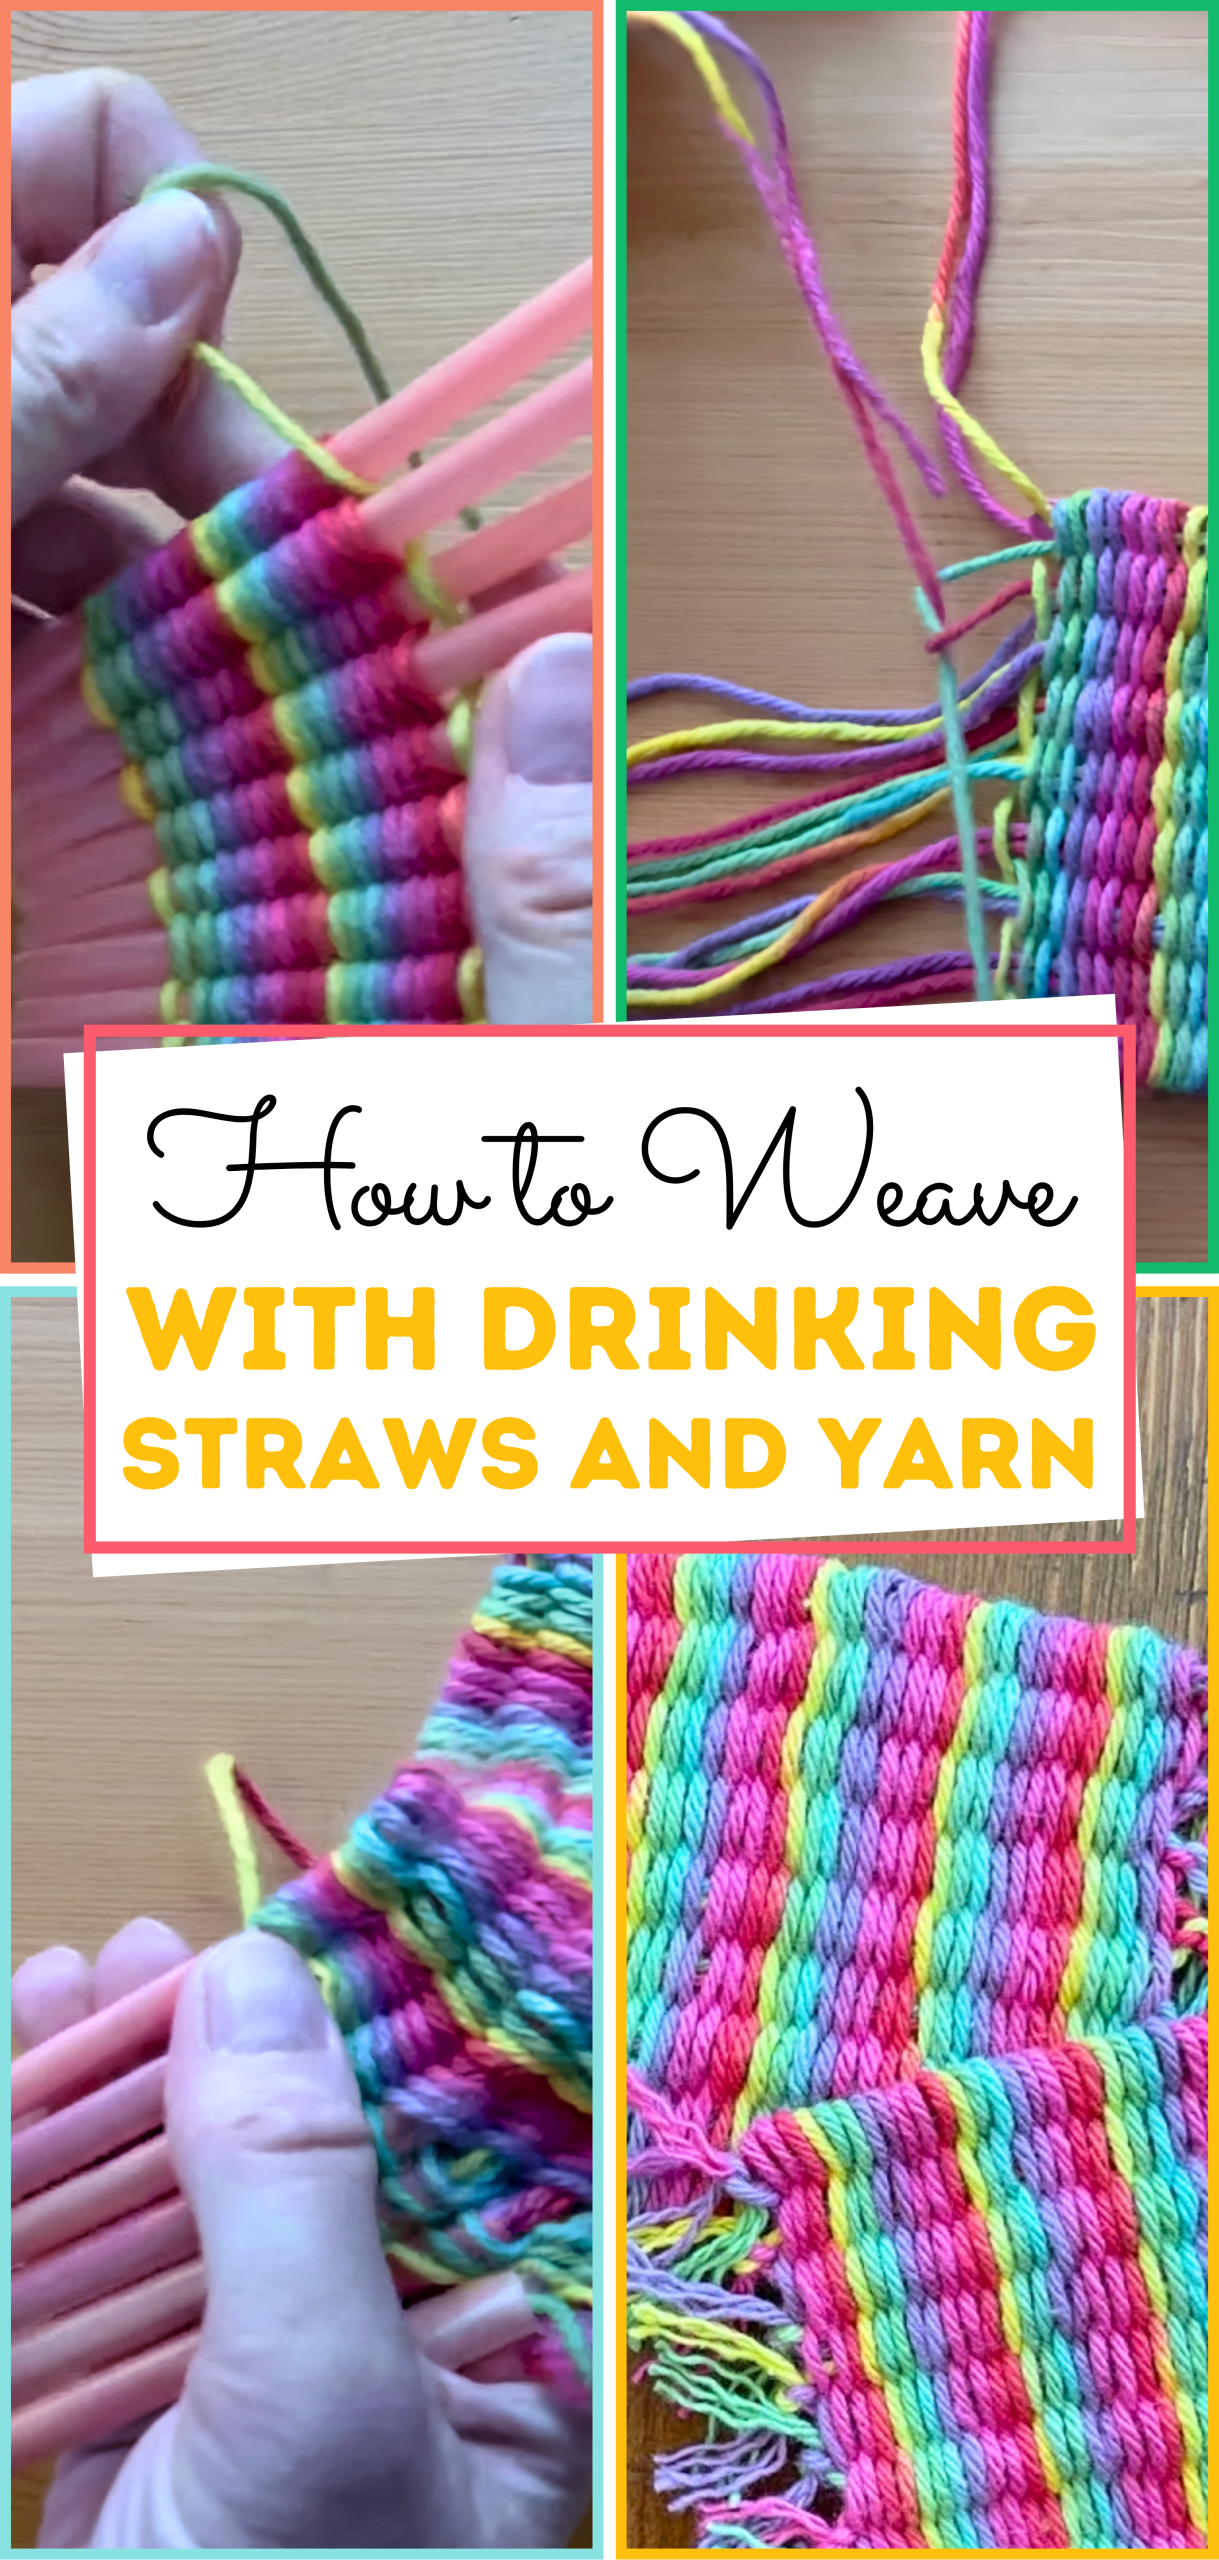
I grabbed a few straight plastic straws (I made sure to avoid the bendy kind), cotton yarn in fun, shifting colors, and masking tape. The video walked me through how to tape the straws down and thread yarn through each one to create the warp.
It all made sense suddenly; no loom needed! As I started weaving back and forth, over and under the straws, I felt the same calm joy that I get from crafting my sock kitten. I loved that I could easily change colors and watch the pattern grow, and the straws held the tension perfectly. No tangles, no chaos, just a nice rhythm of weaving.
When I finally slid the finished piece off the straws, it was more than just a test run. It looked like a tiny tapestry, neat and handmade. I knotted the ends and decided to hang it on my wall, but I already knew I’d be making more: maybe a set of coasters or even a little woven pouch.
What started as a curious click turned into my favorite no-sew craft of the month. Now, every time I weave with yarn and straws, I’m reminded that beautiful things don’t need to be complicated; they just need a little imagination and a few simple tools.
What You Will Need
- 3–6 straight drinking straws (plastic or paper; avoid flexible bendy ones)
- Yarn (cotton, acrylic, variegated yarn works great for color shifts)
- Masking or painter’s tape
- Scissors
- Optional: wooden skewer or knitting needle (to help push yarn through straws)
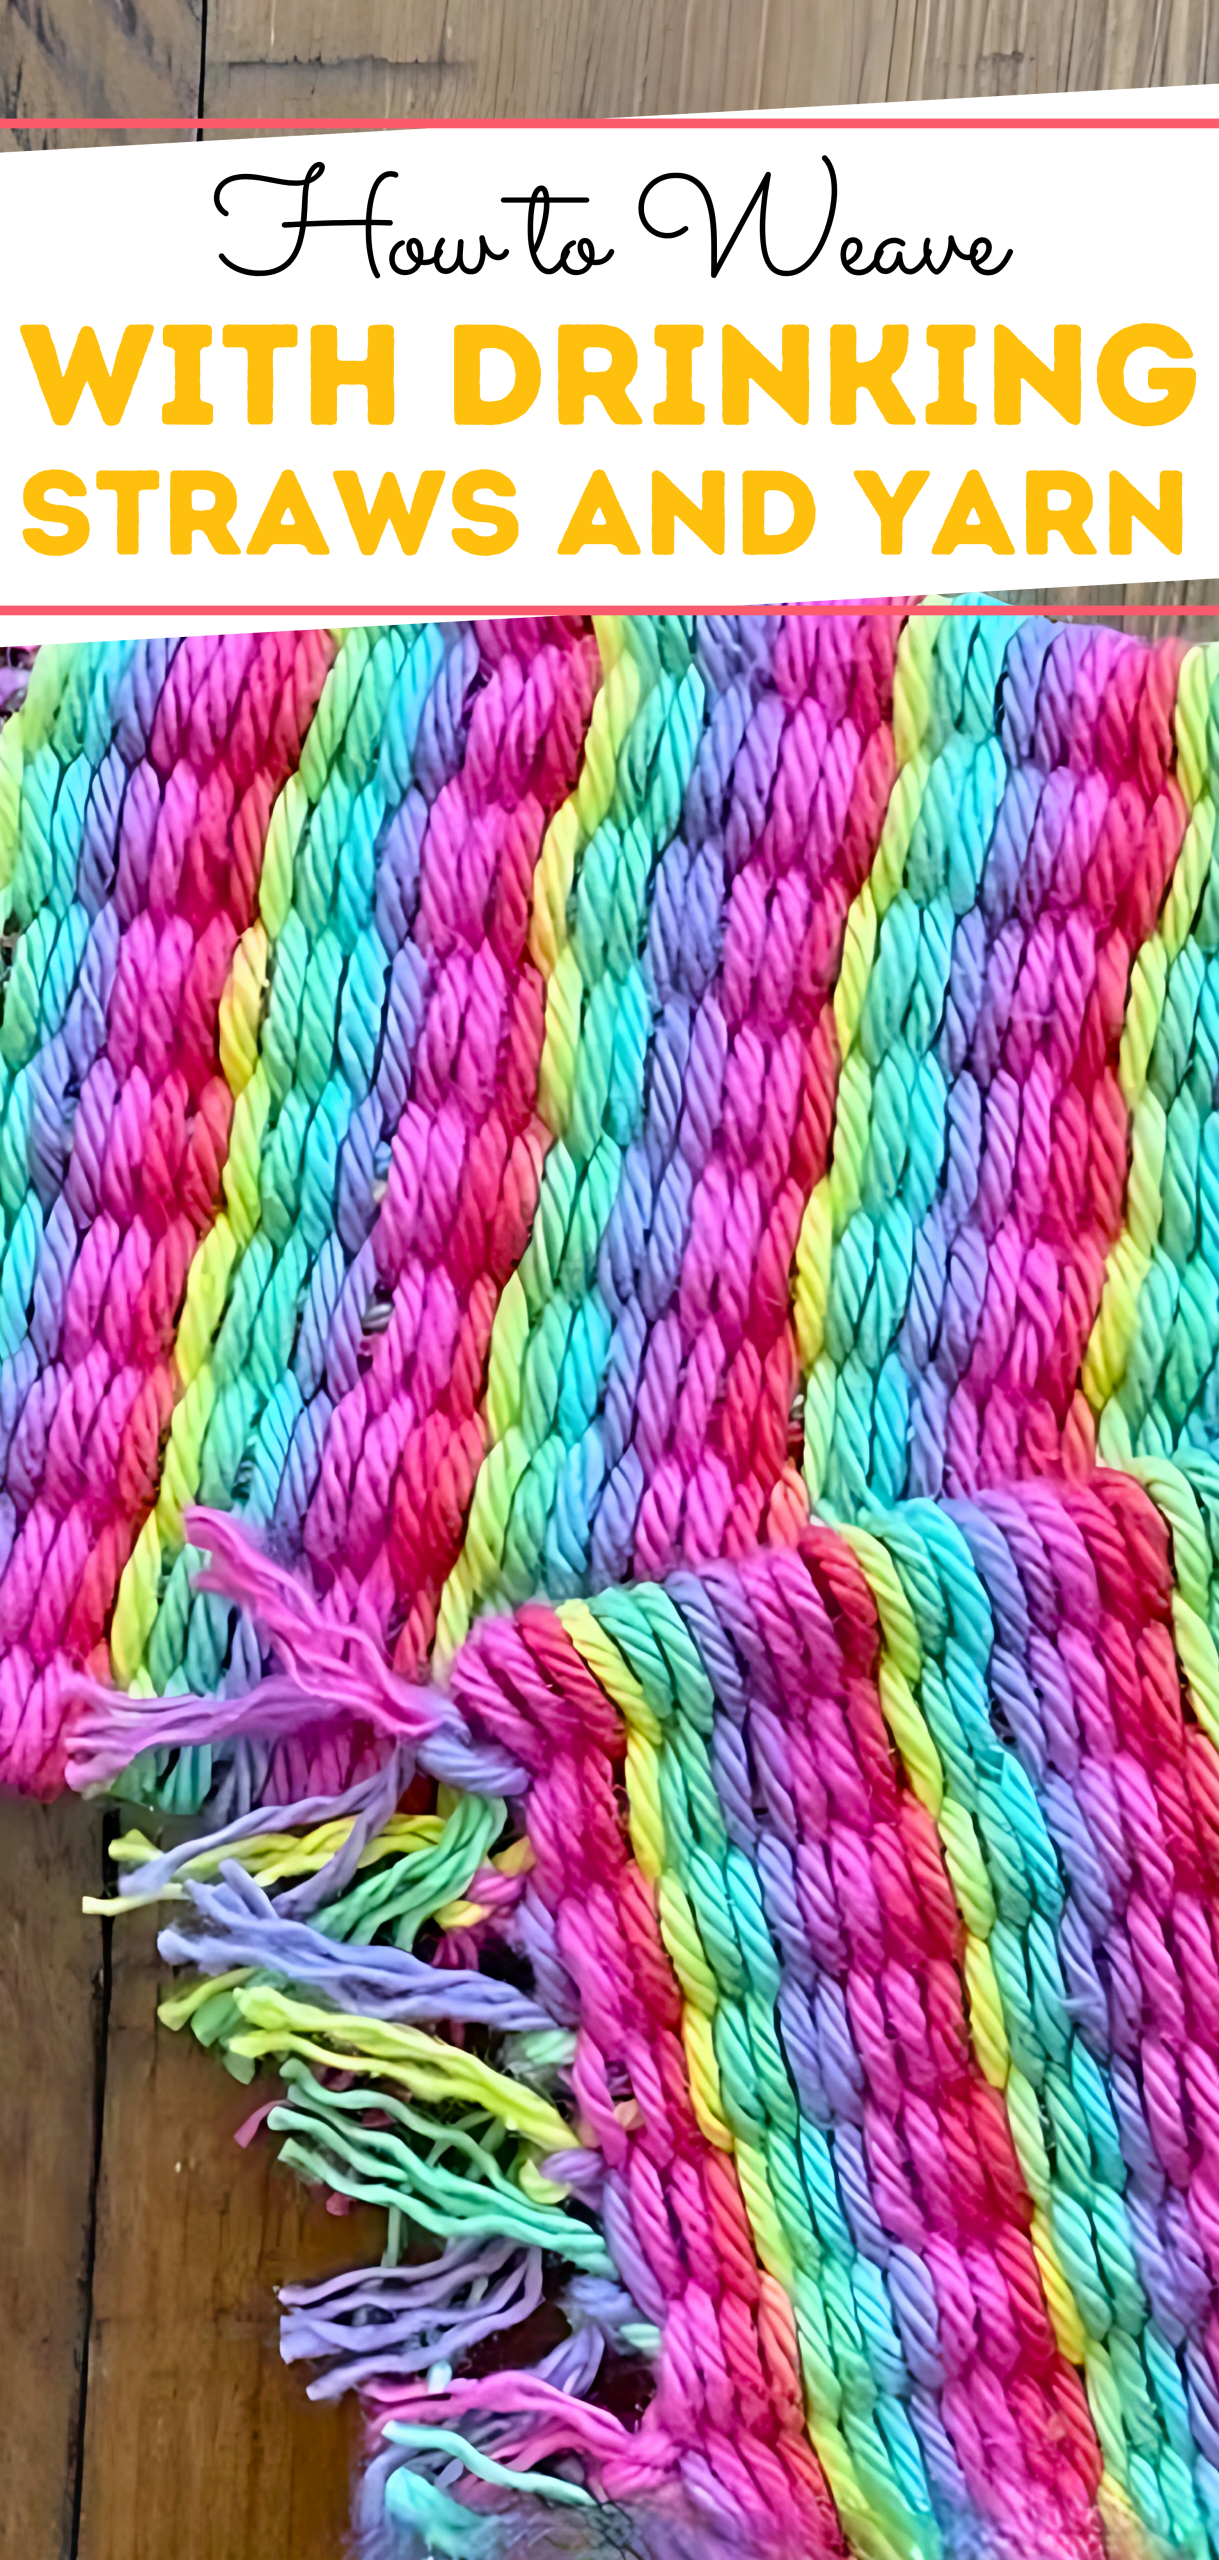
How to Weave with Drinking Straws and Yarn
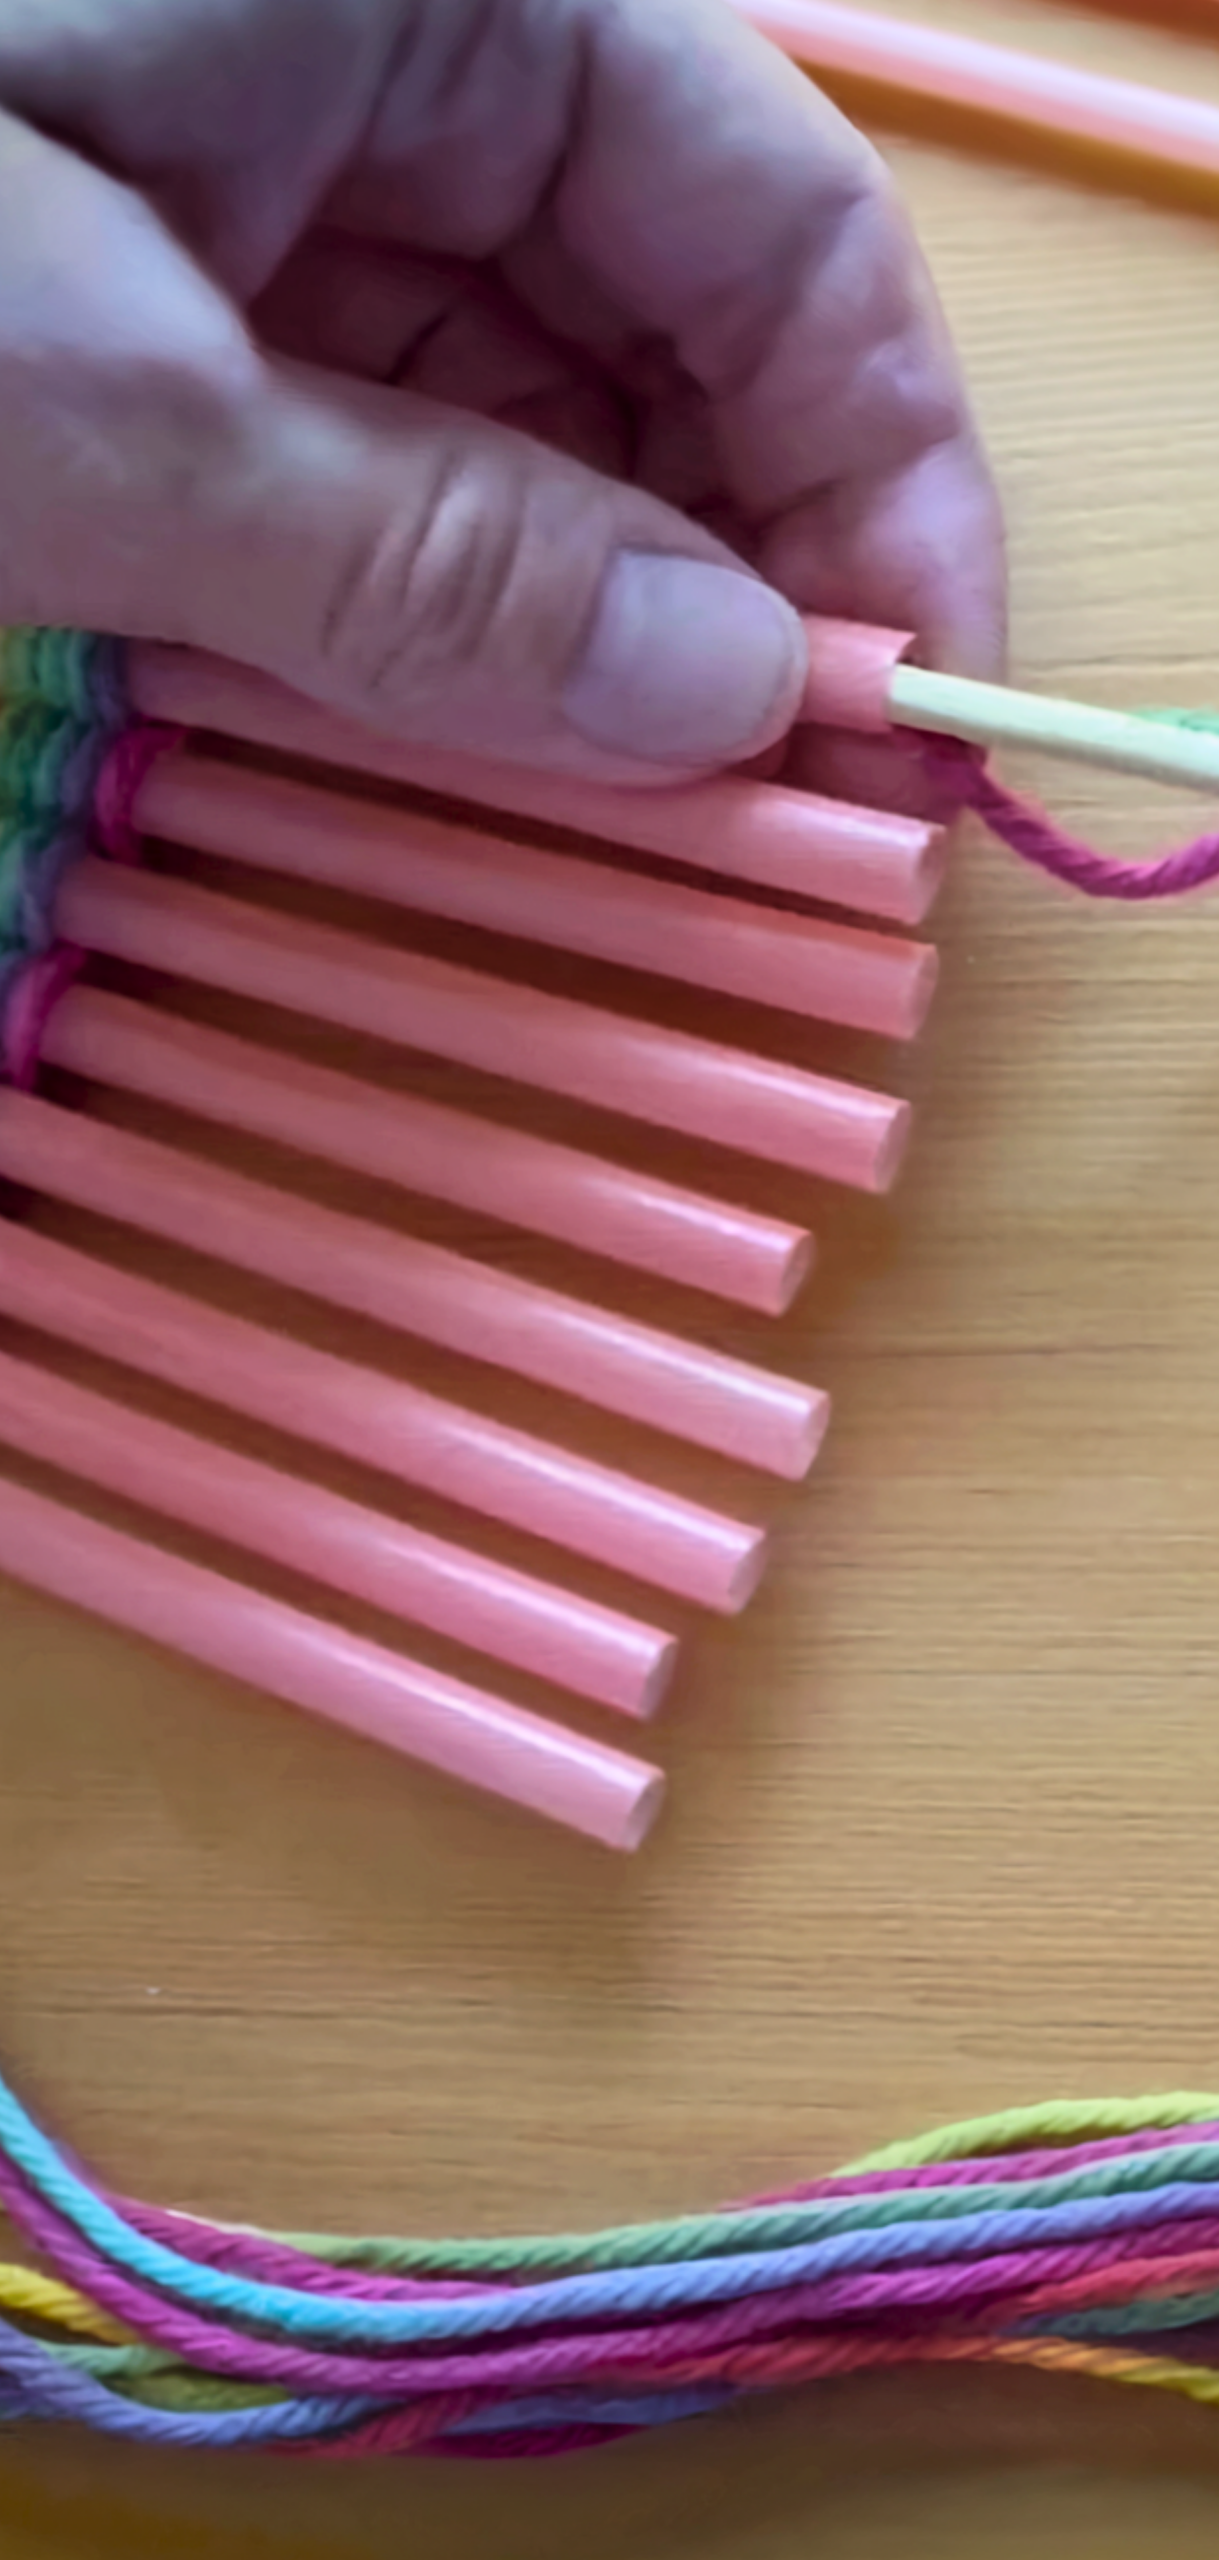
Step 1: Prepare Your Straw Loom
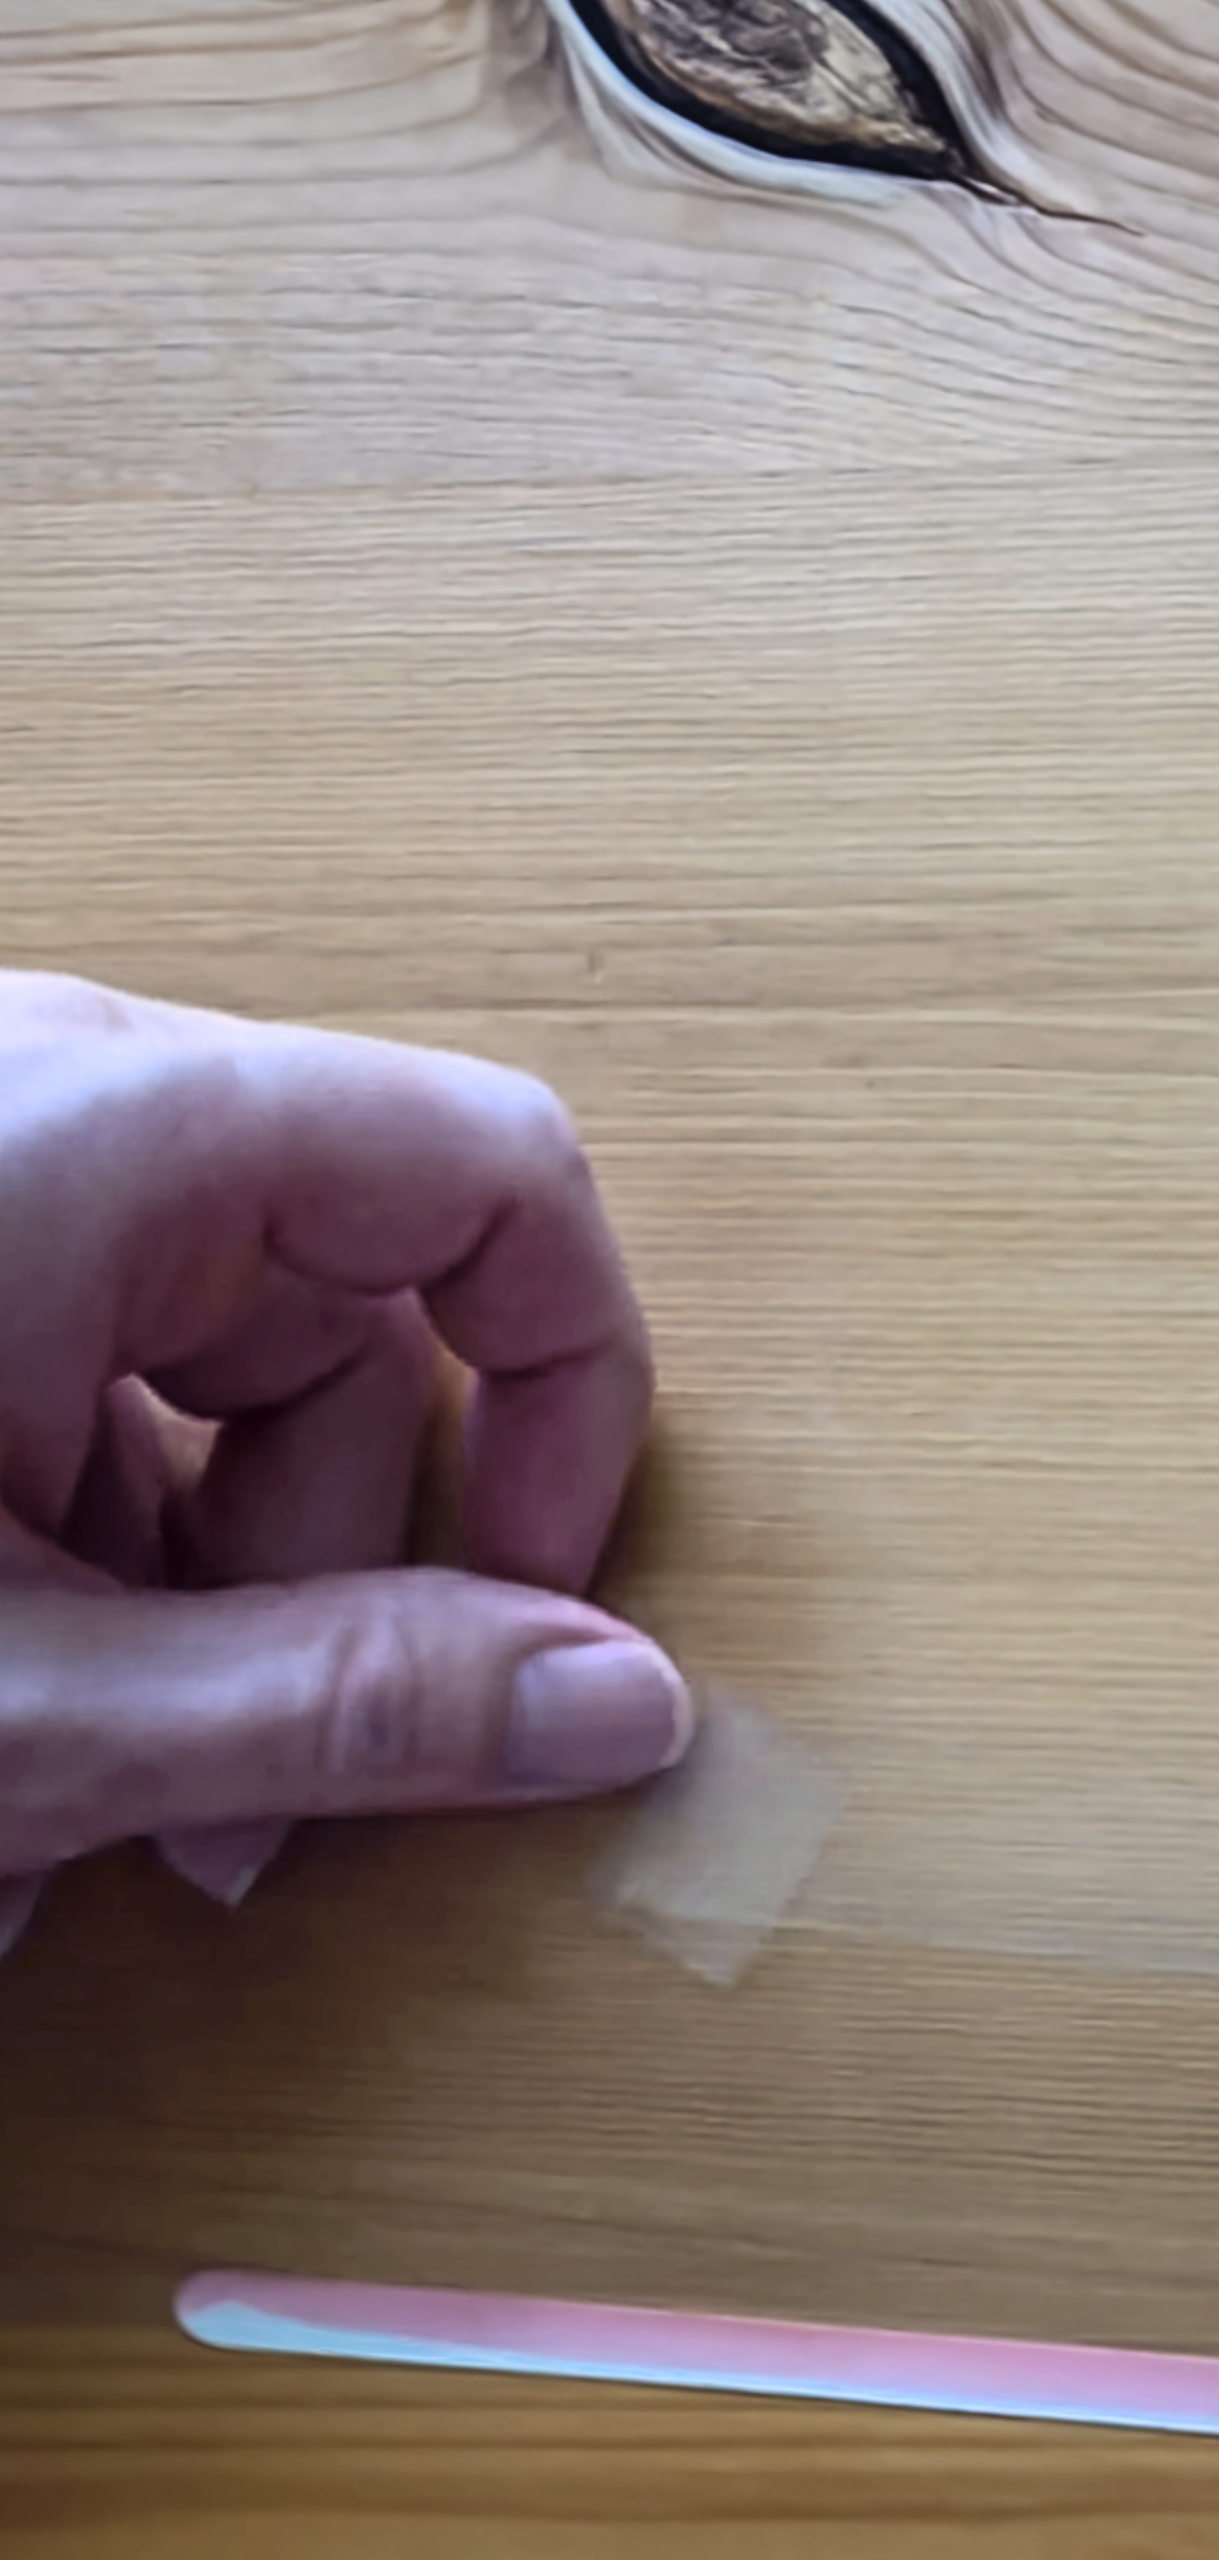
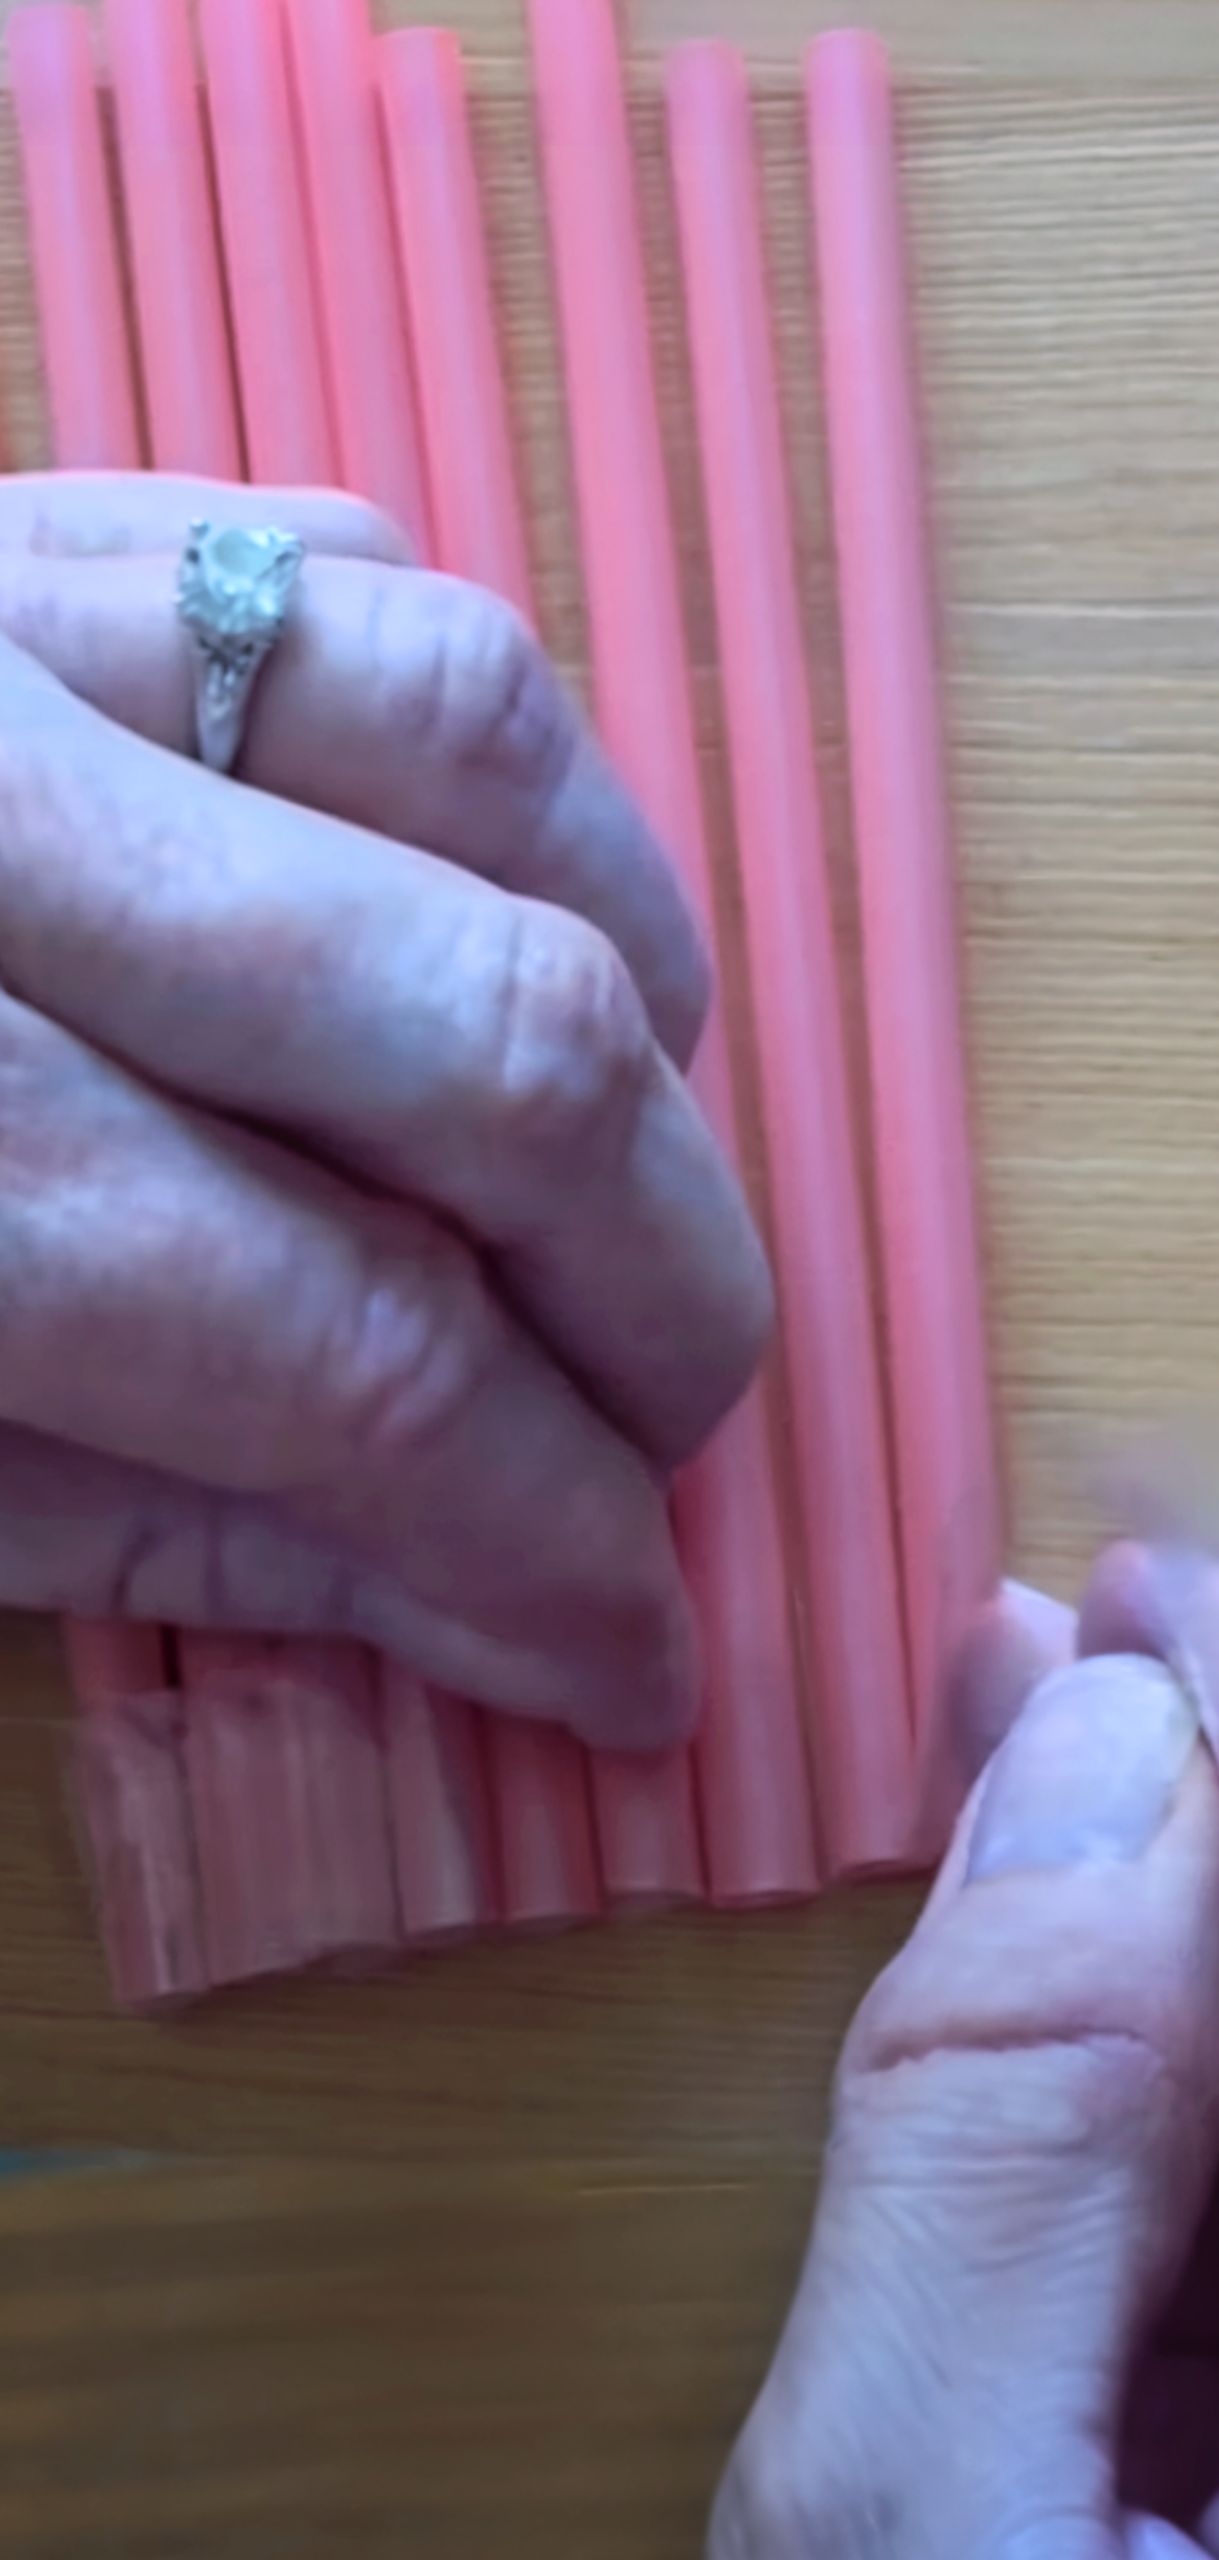
Line up three straws side by side with small gaps between them, then tape one end securely together using masking tape. You can tape the other end to a table or piece of cardboard to keep the loom stable while weaving.
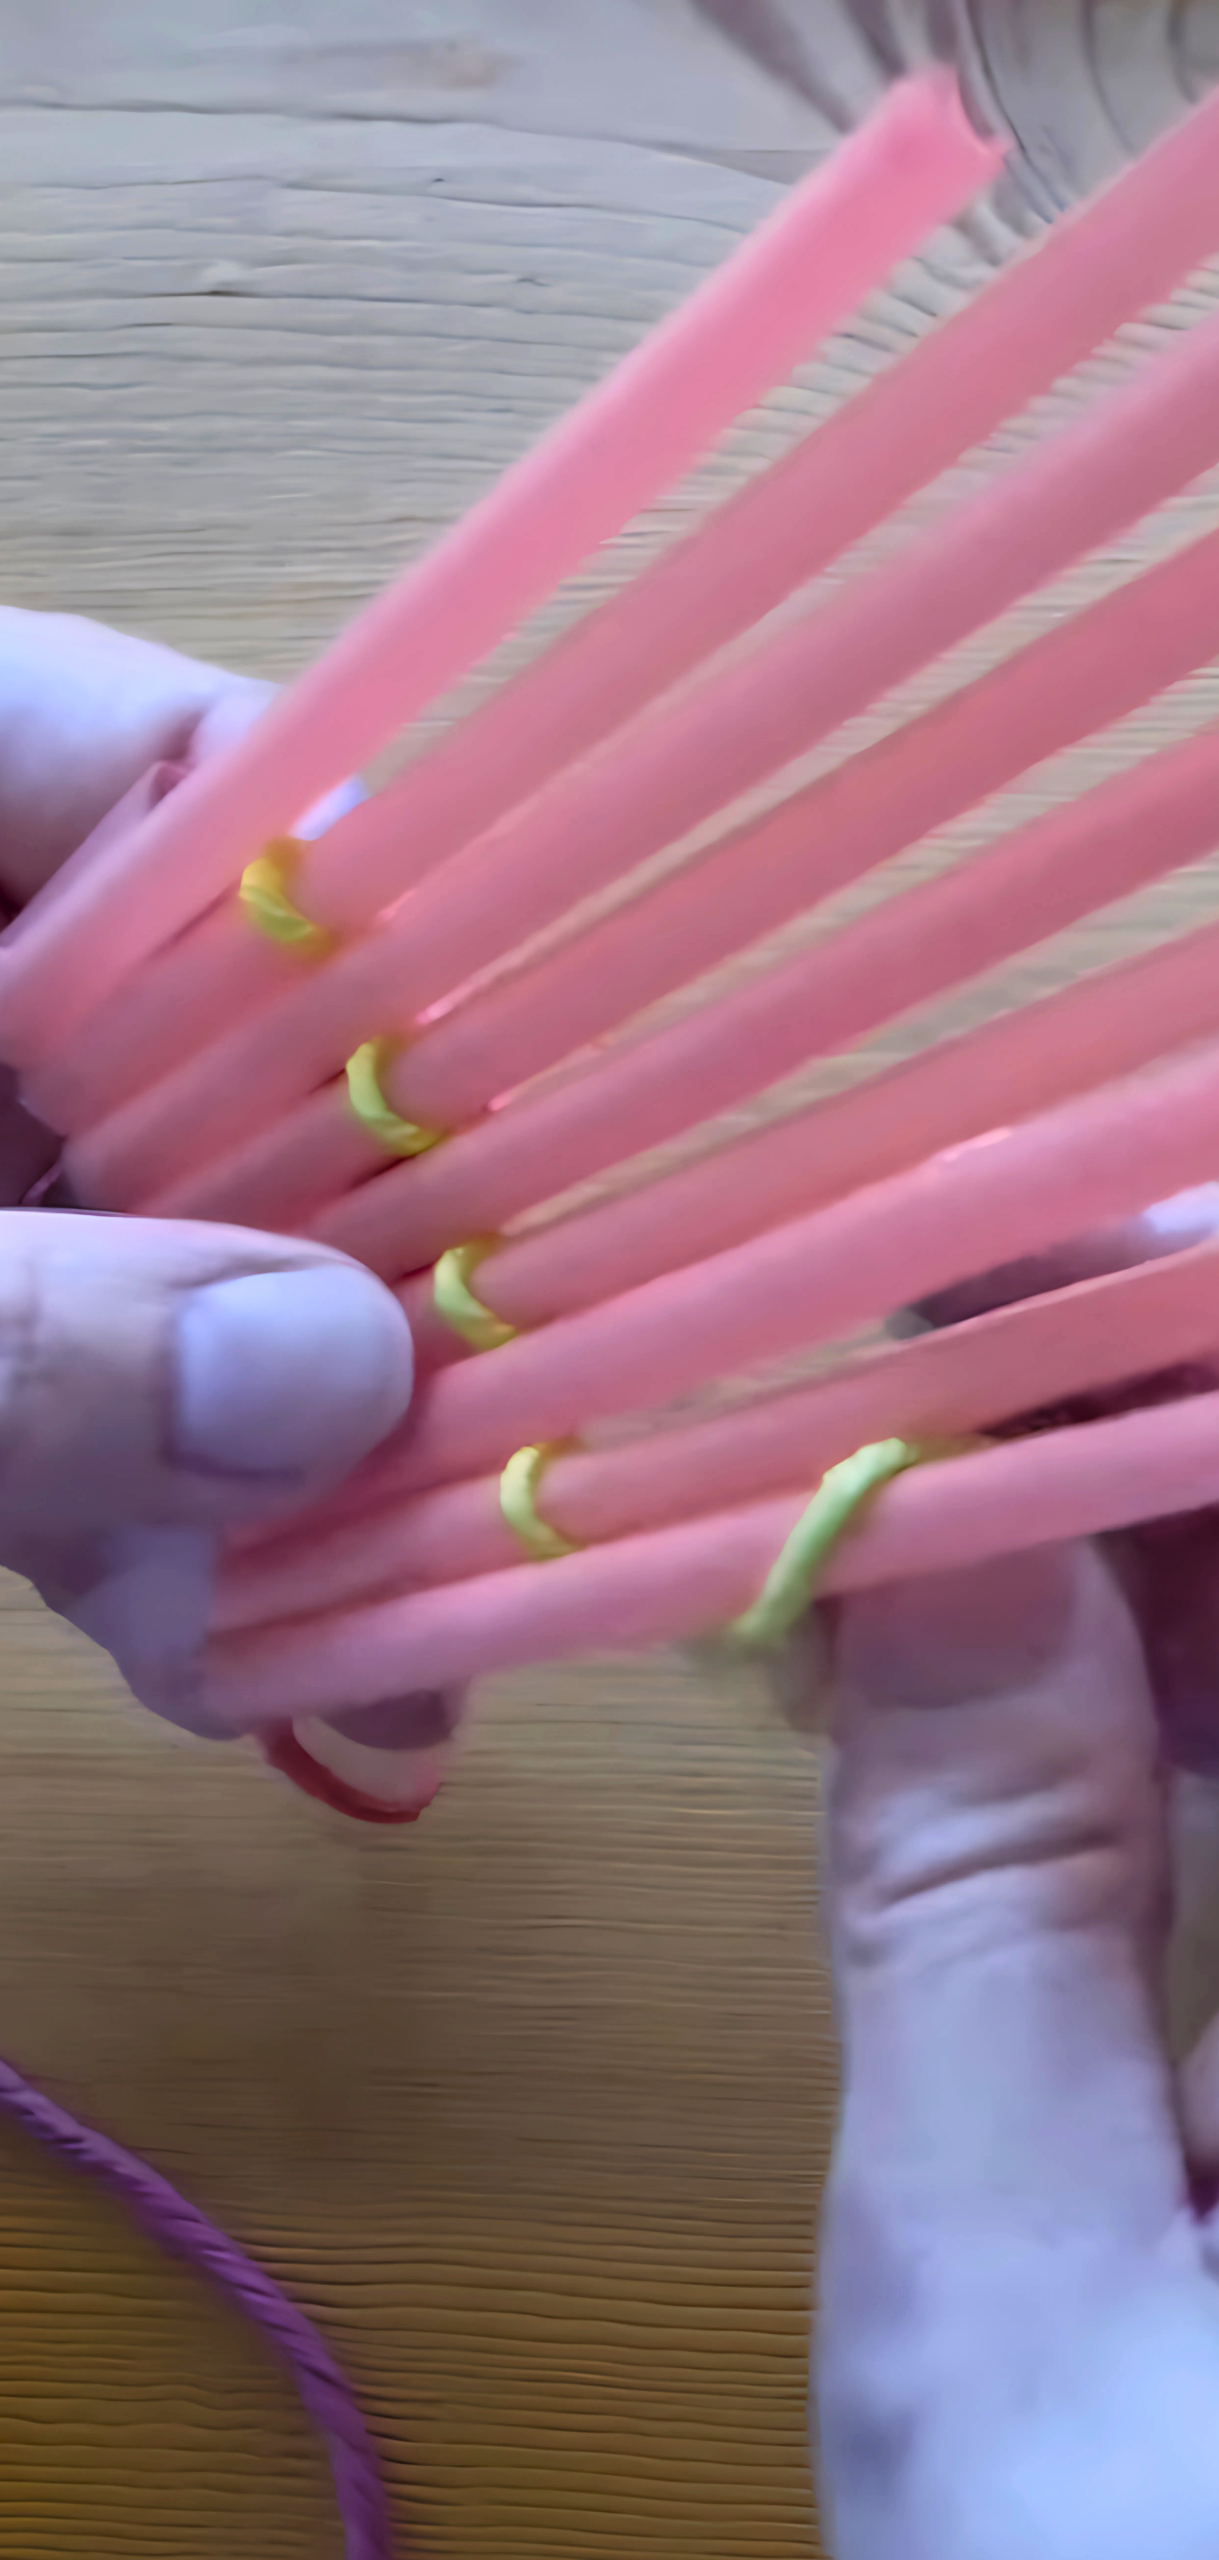
Step 2: Thread the Yarns Through

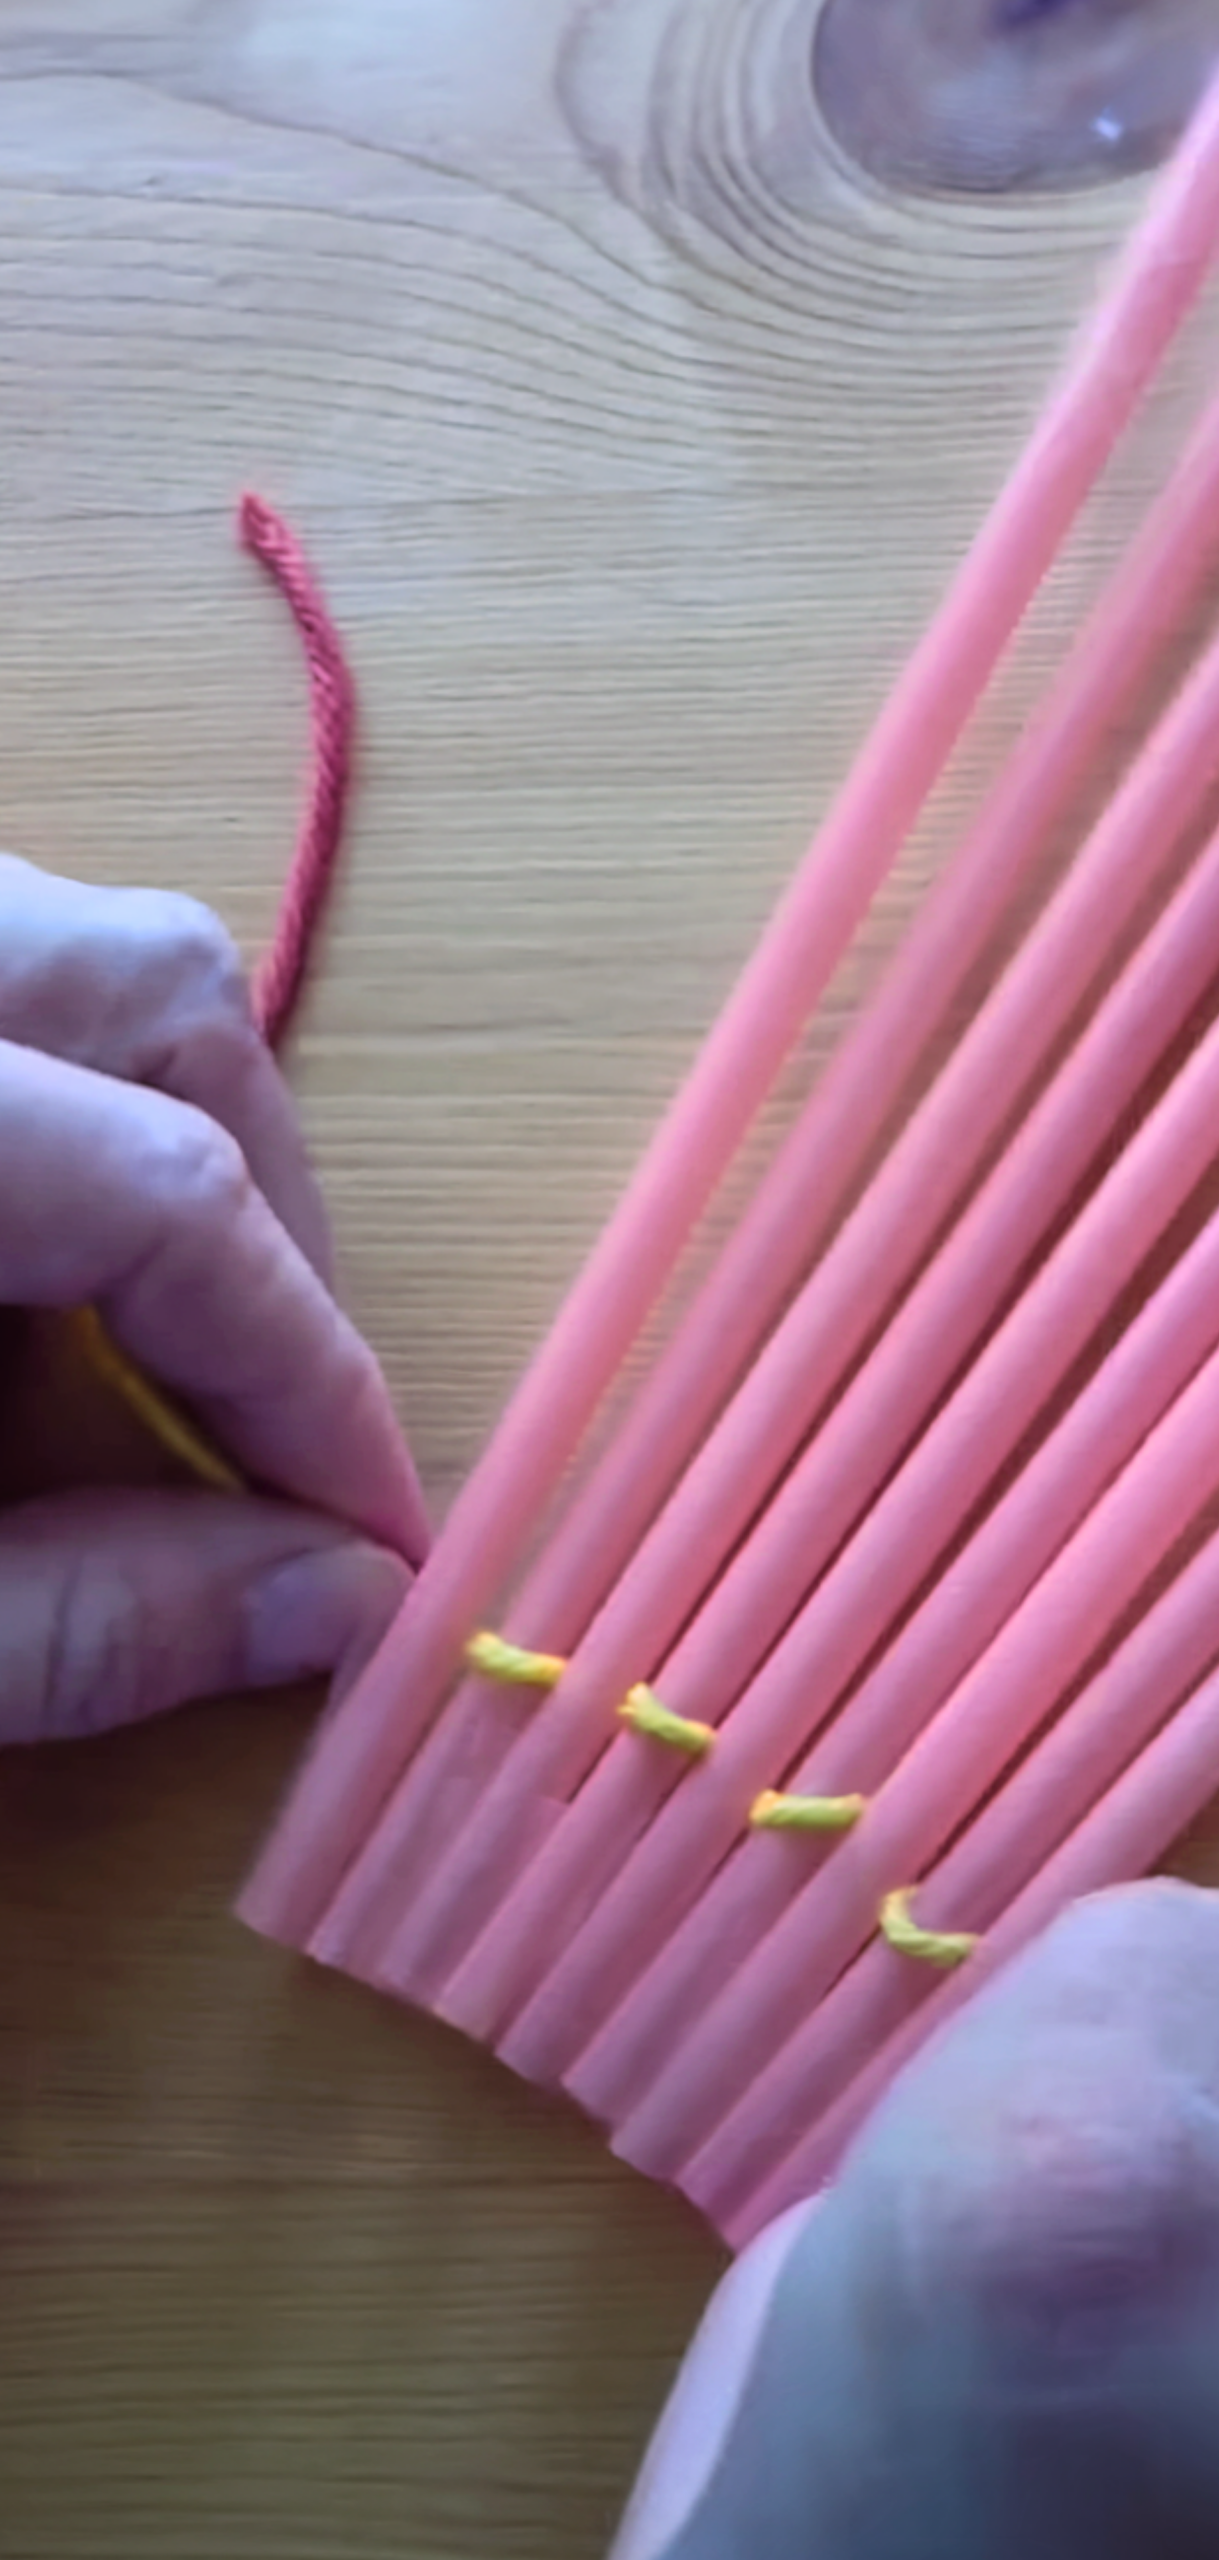
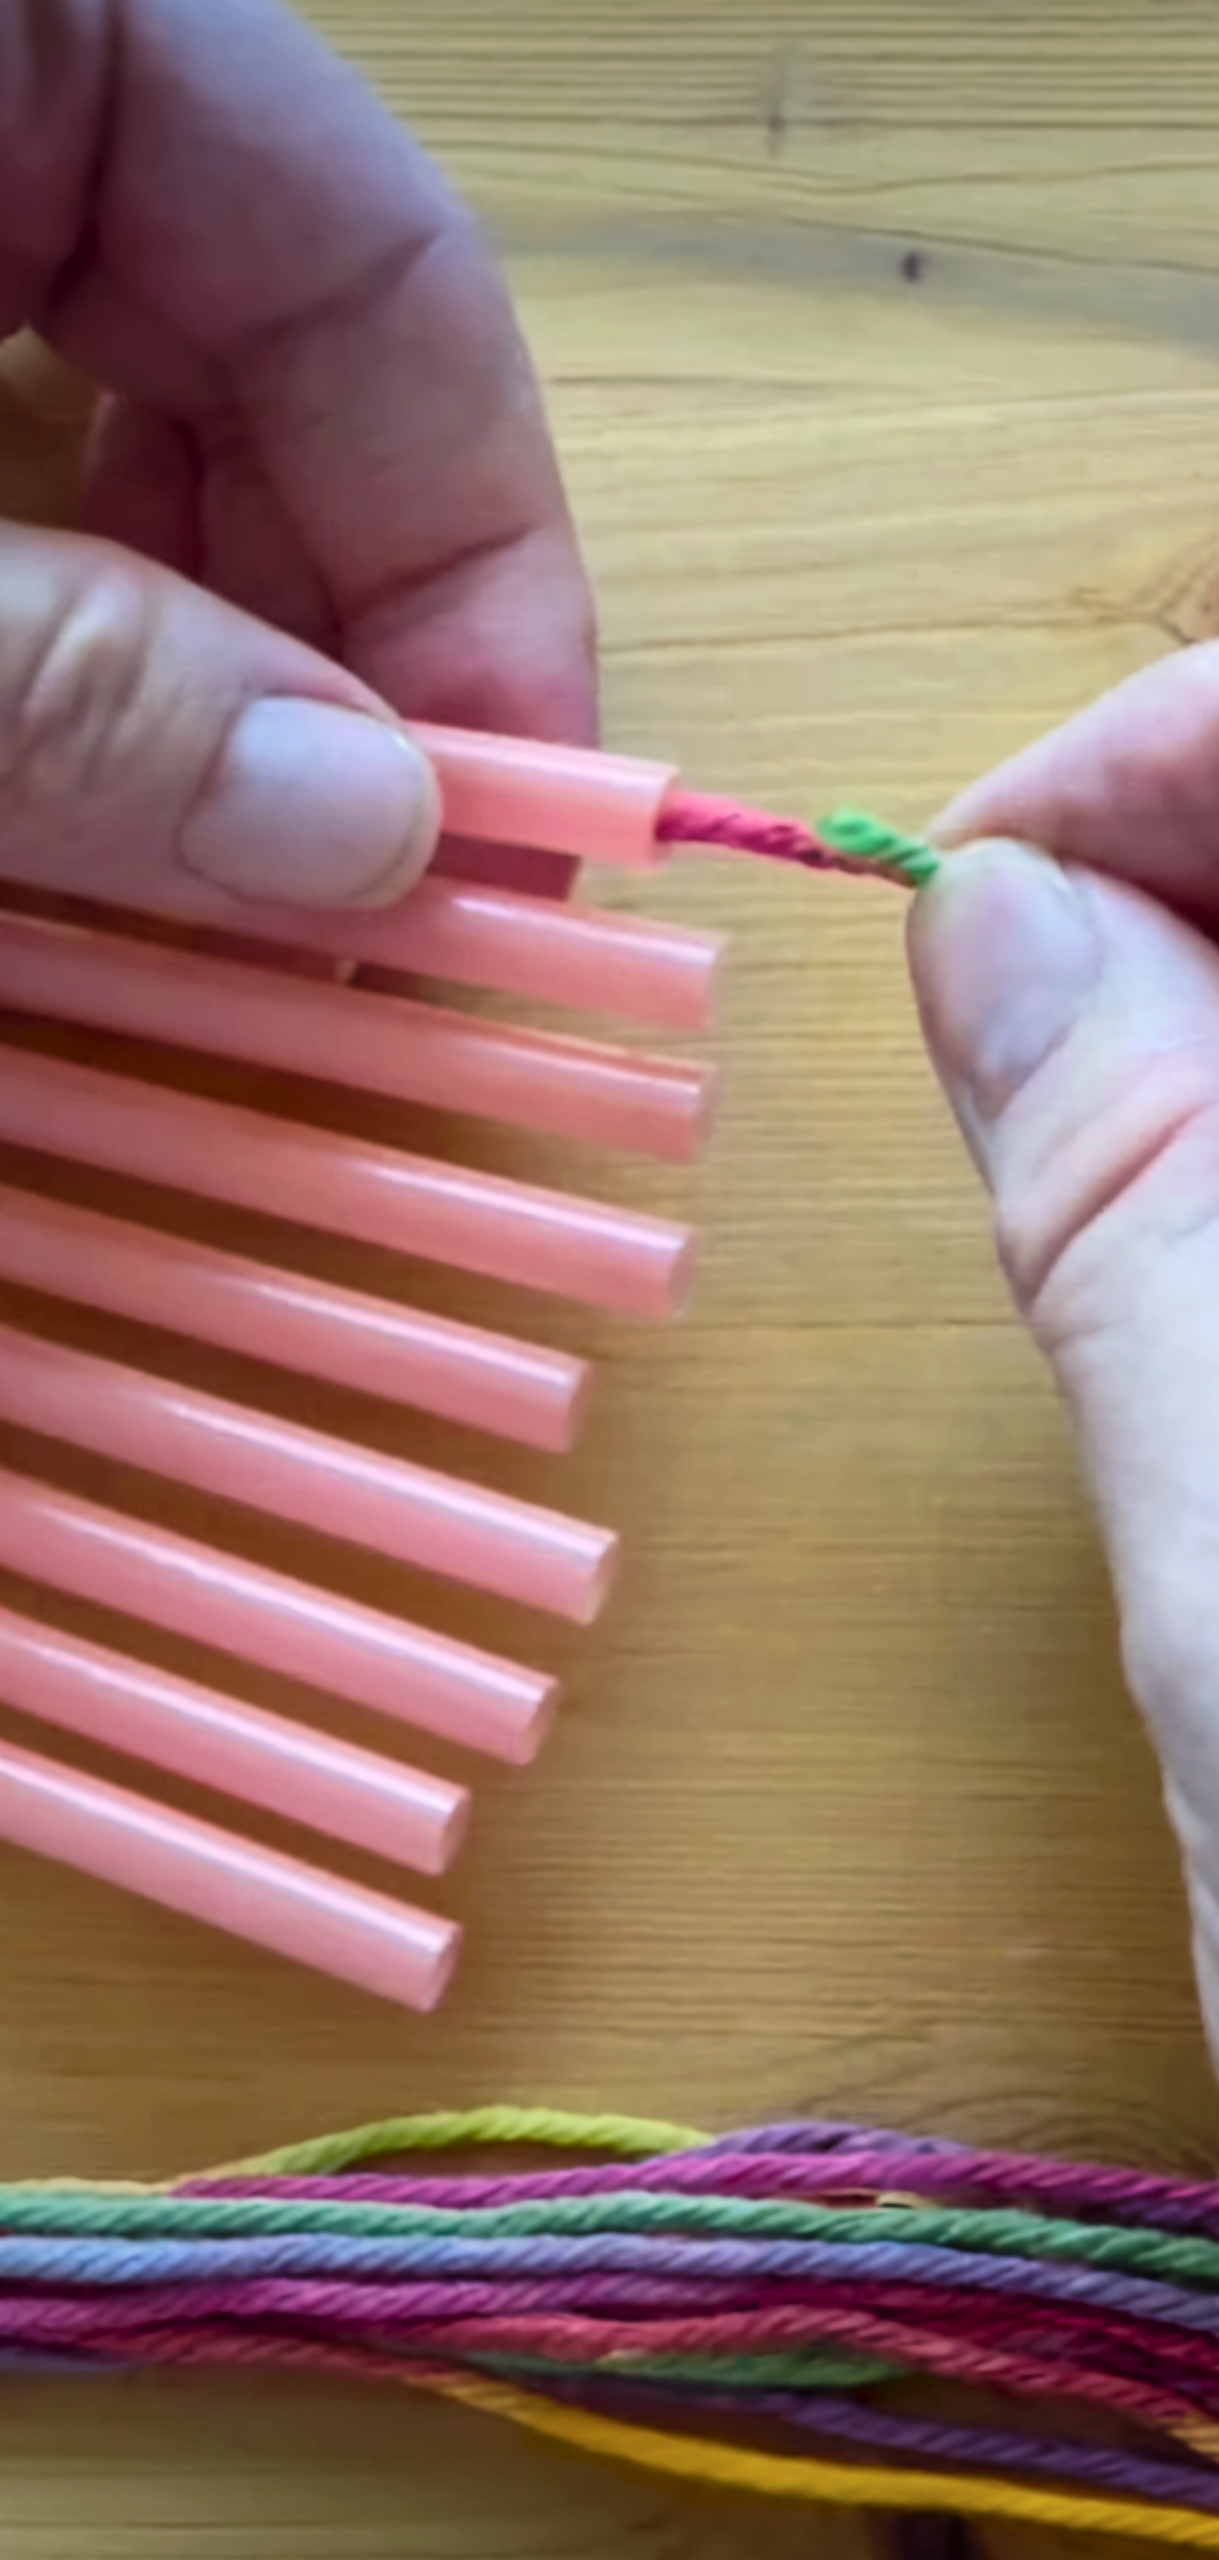
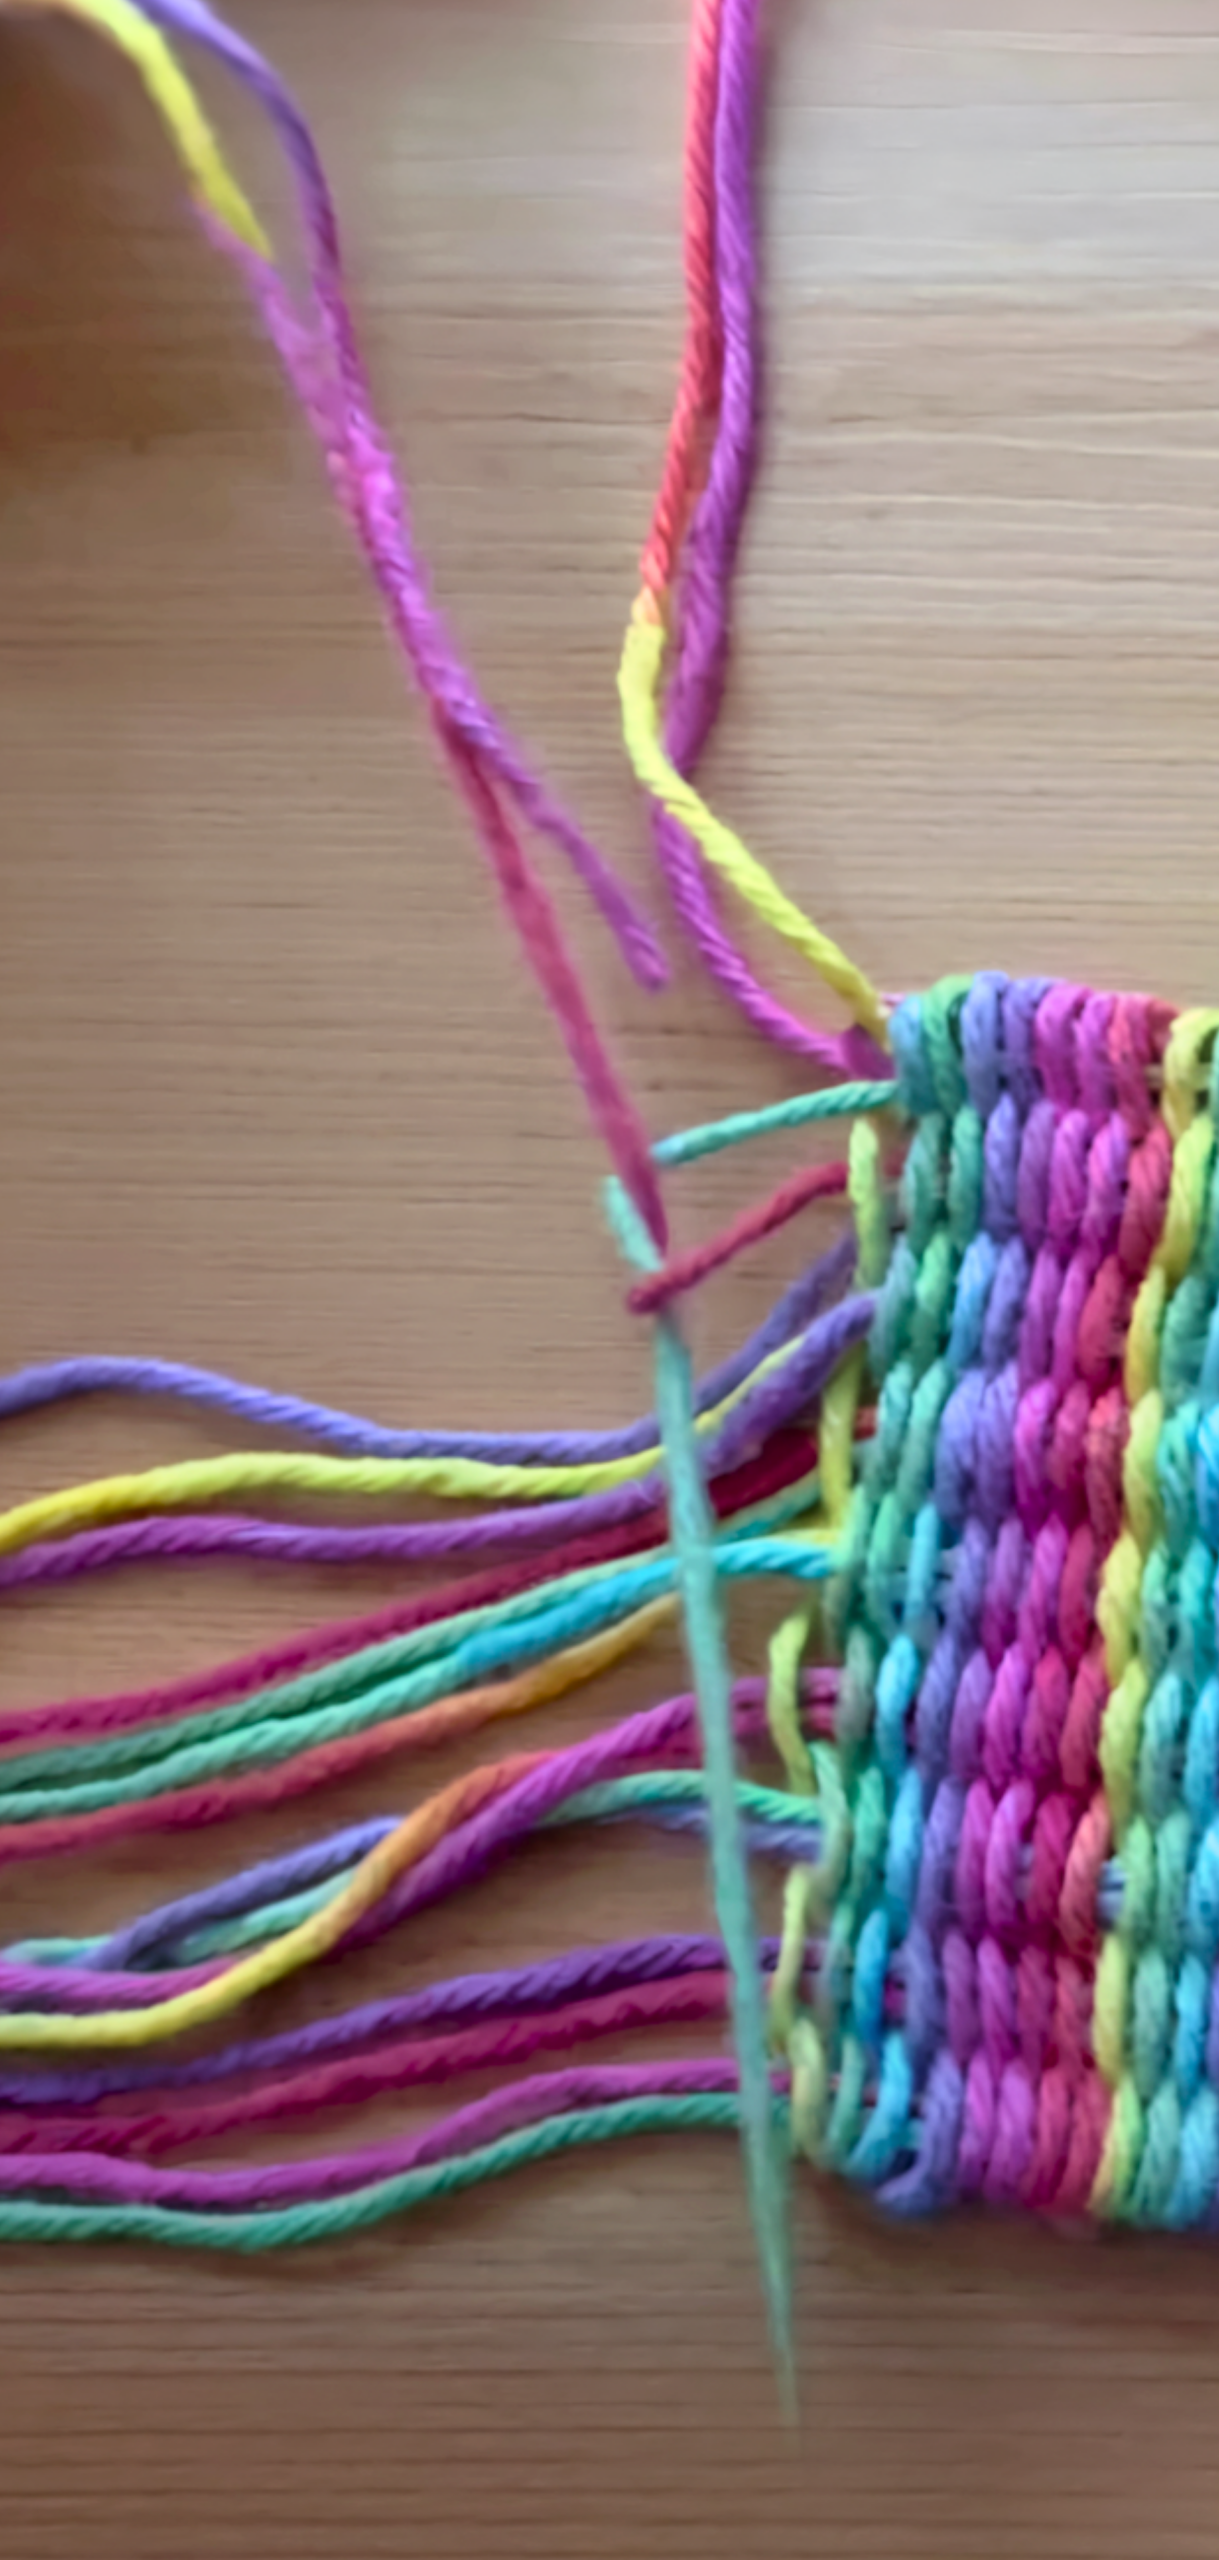
Cut three strands of yarn, each slightly longer than the straws. Thread one through each straw, using a skewer if needed to push it through. Tie the top ends of all three strands together in an overhand knot; this will be your starting point.
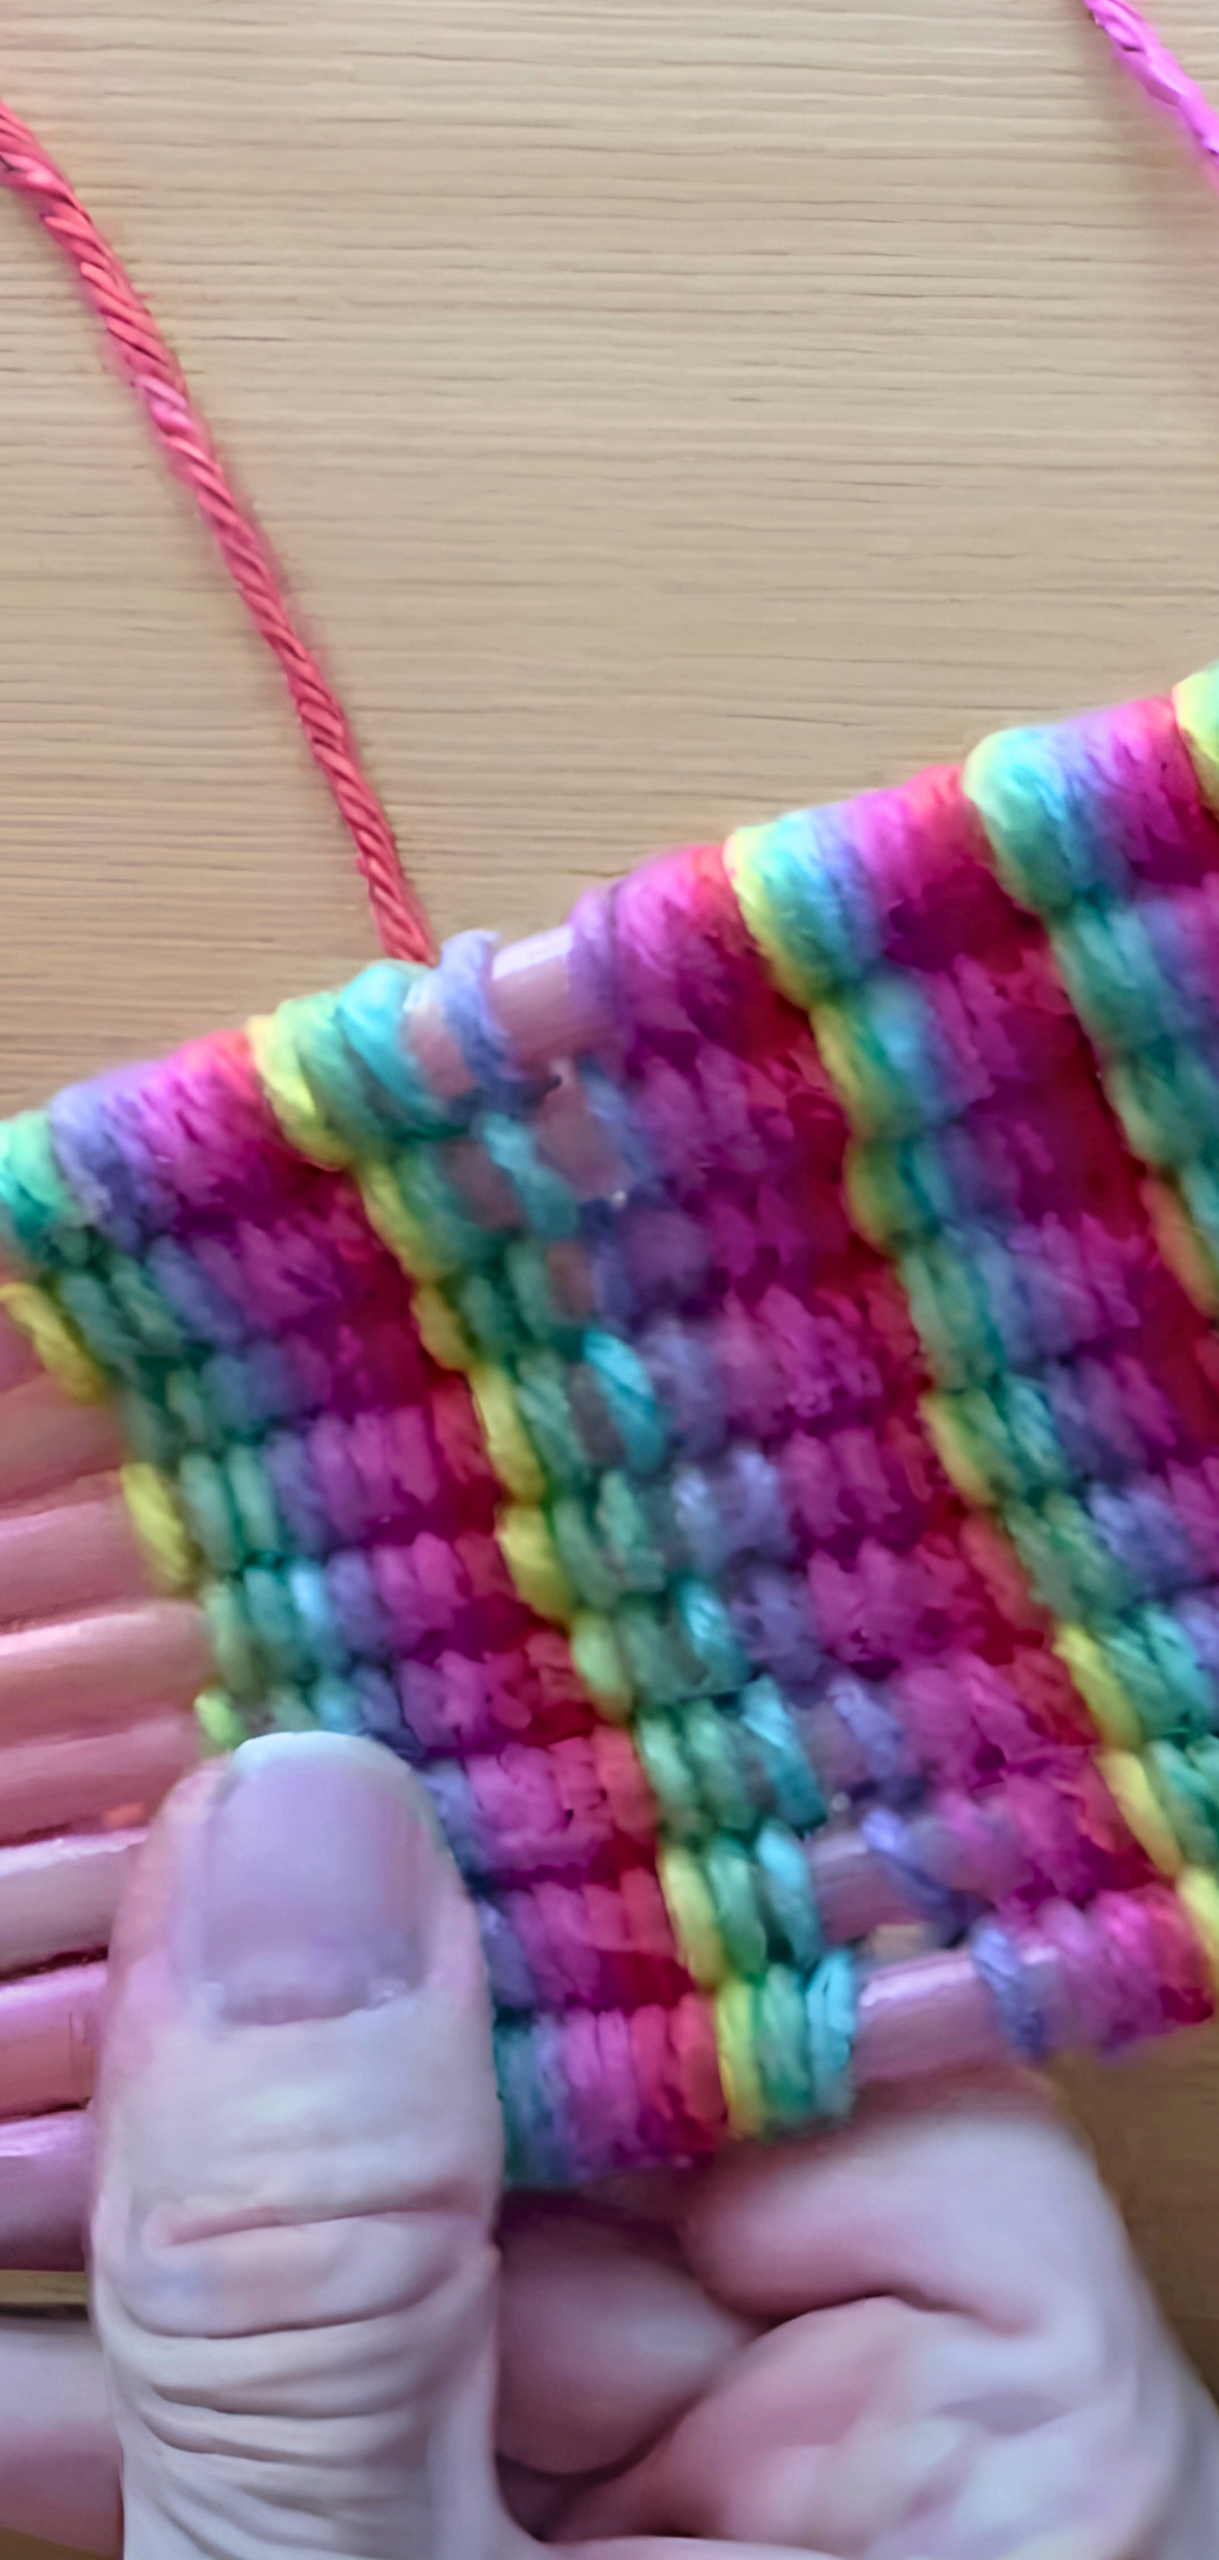
Step 3: Begin to Weave (Over, Under Pattern)
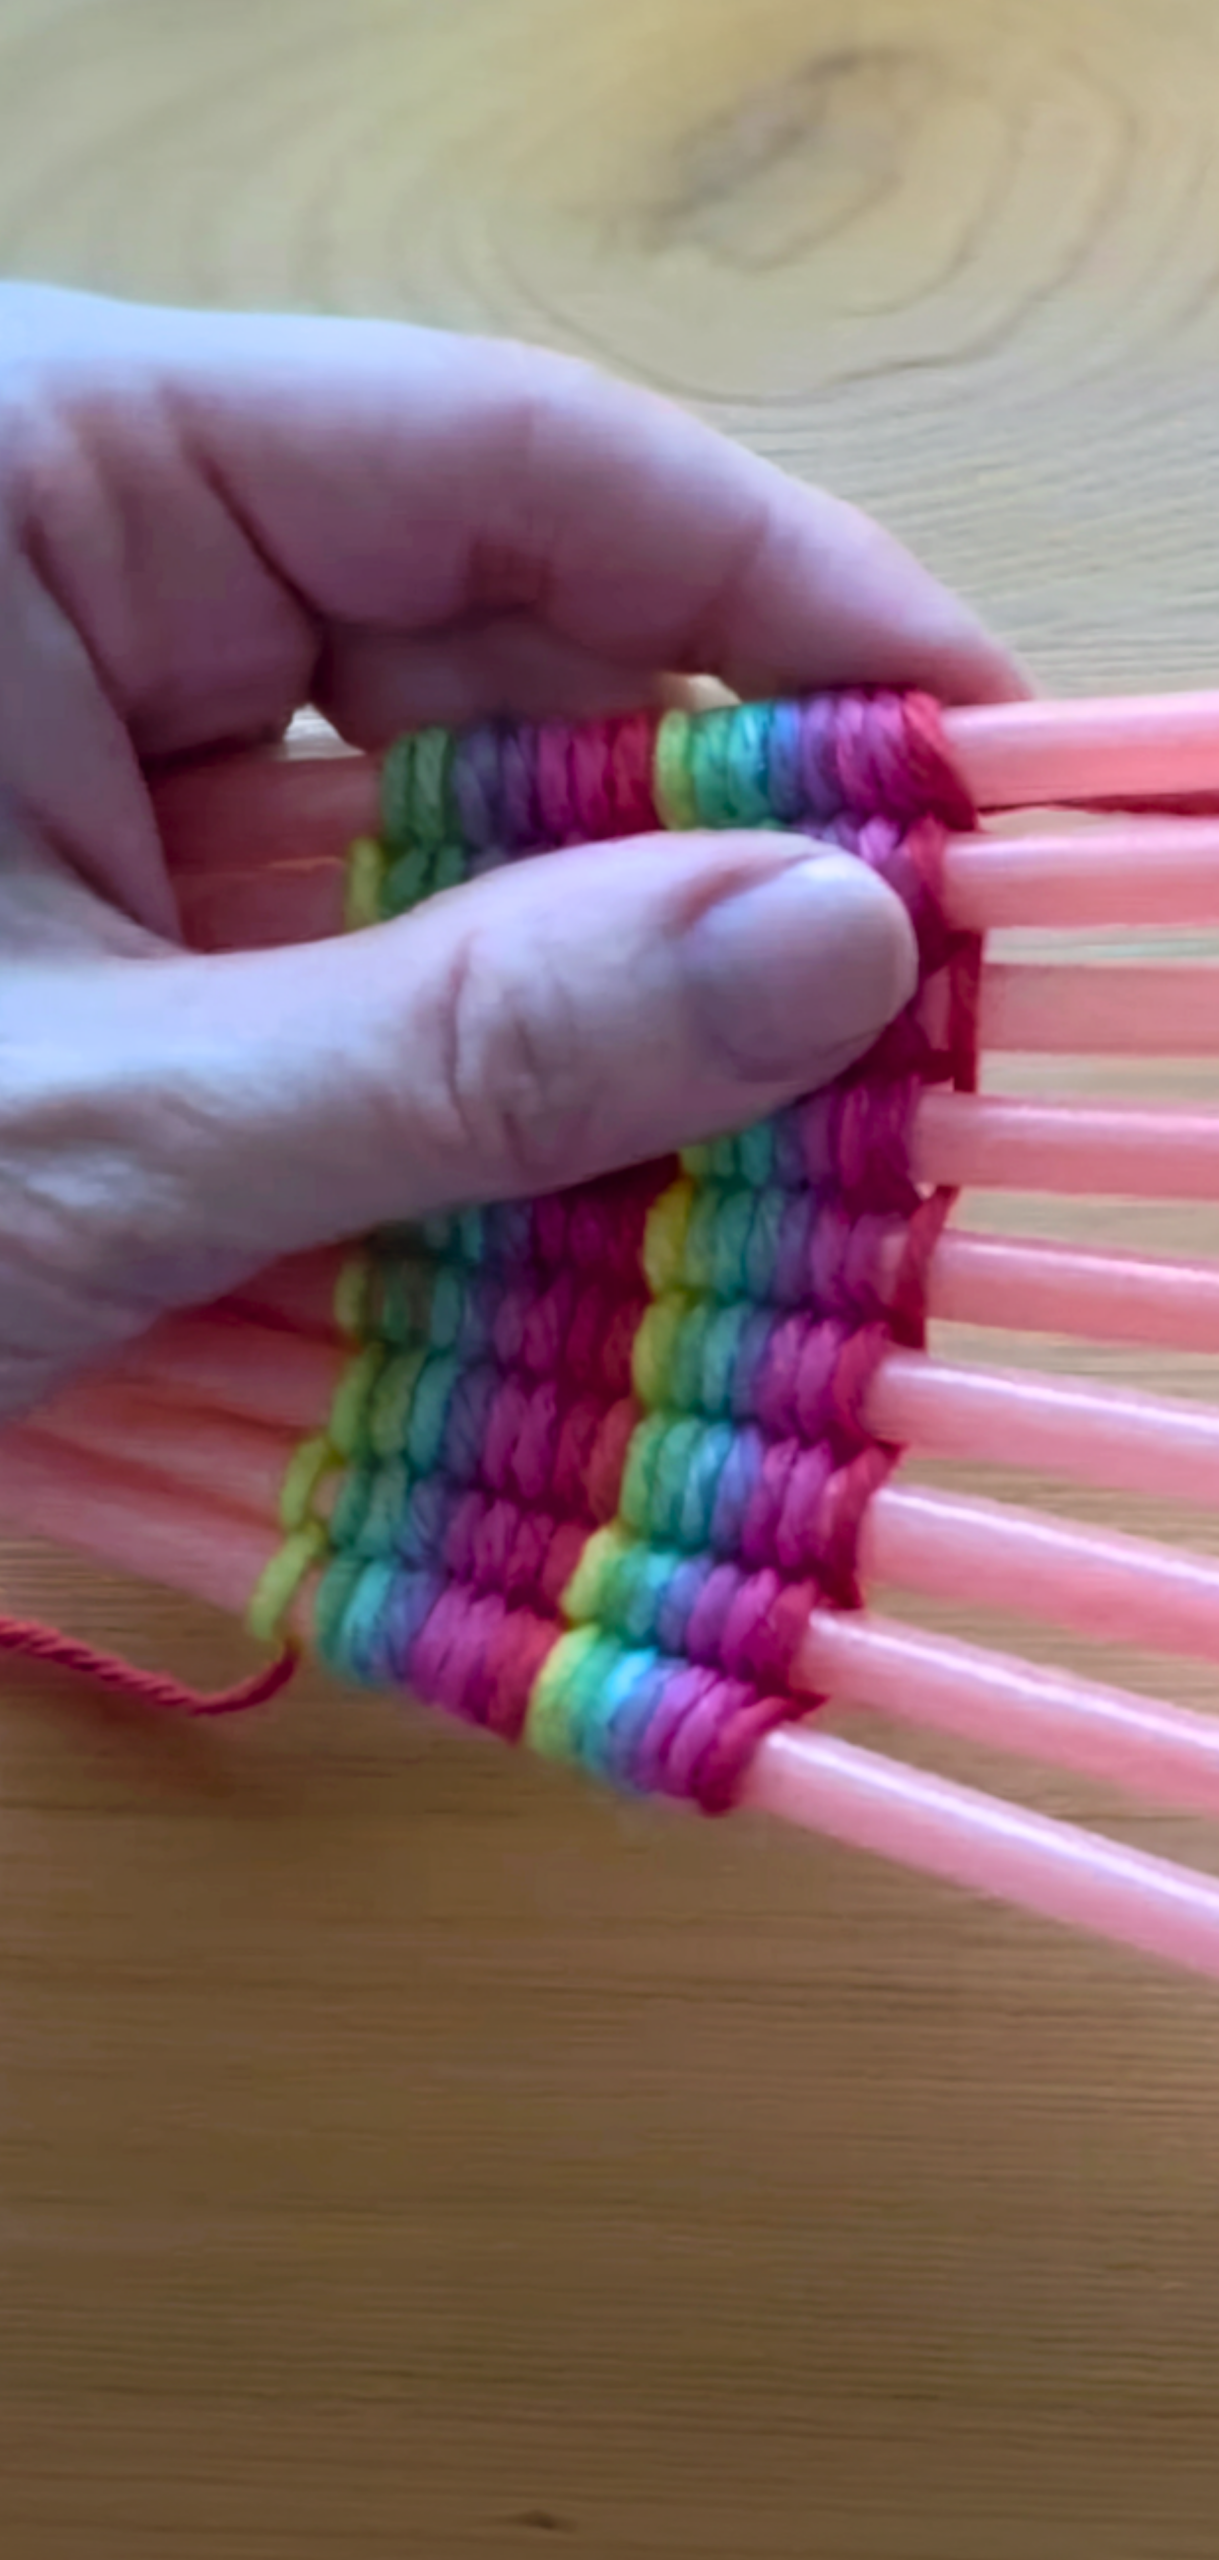
Use a new piece of yarn for weaving. Tie it at one end to the first straw’s warp strand near the taped base. Then follow this pattern:
- Under the middle straw, over the bottom straw
- Under the bottom straw, over the middle straw
- Continue alternating direction as you move across and weave back the other direction.
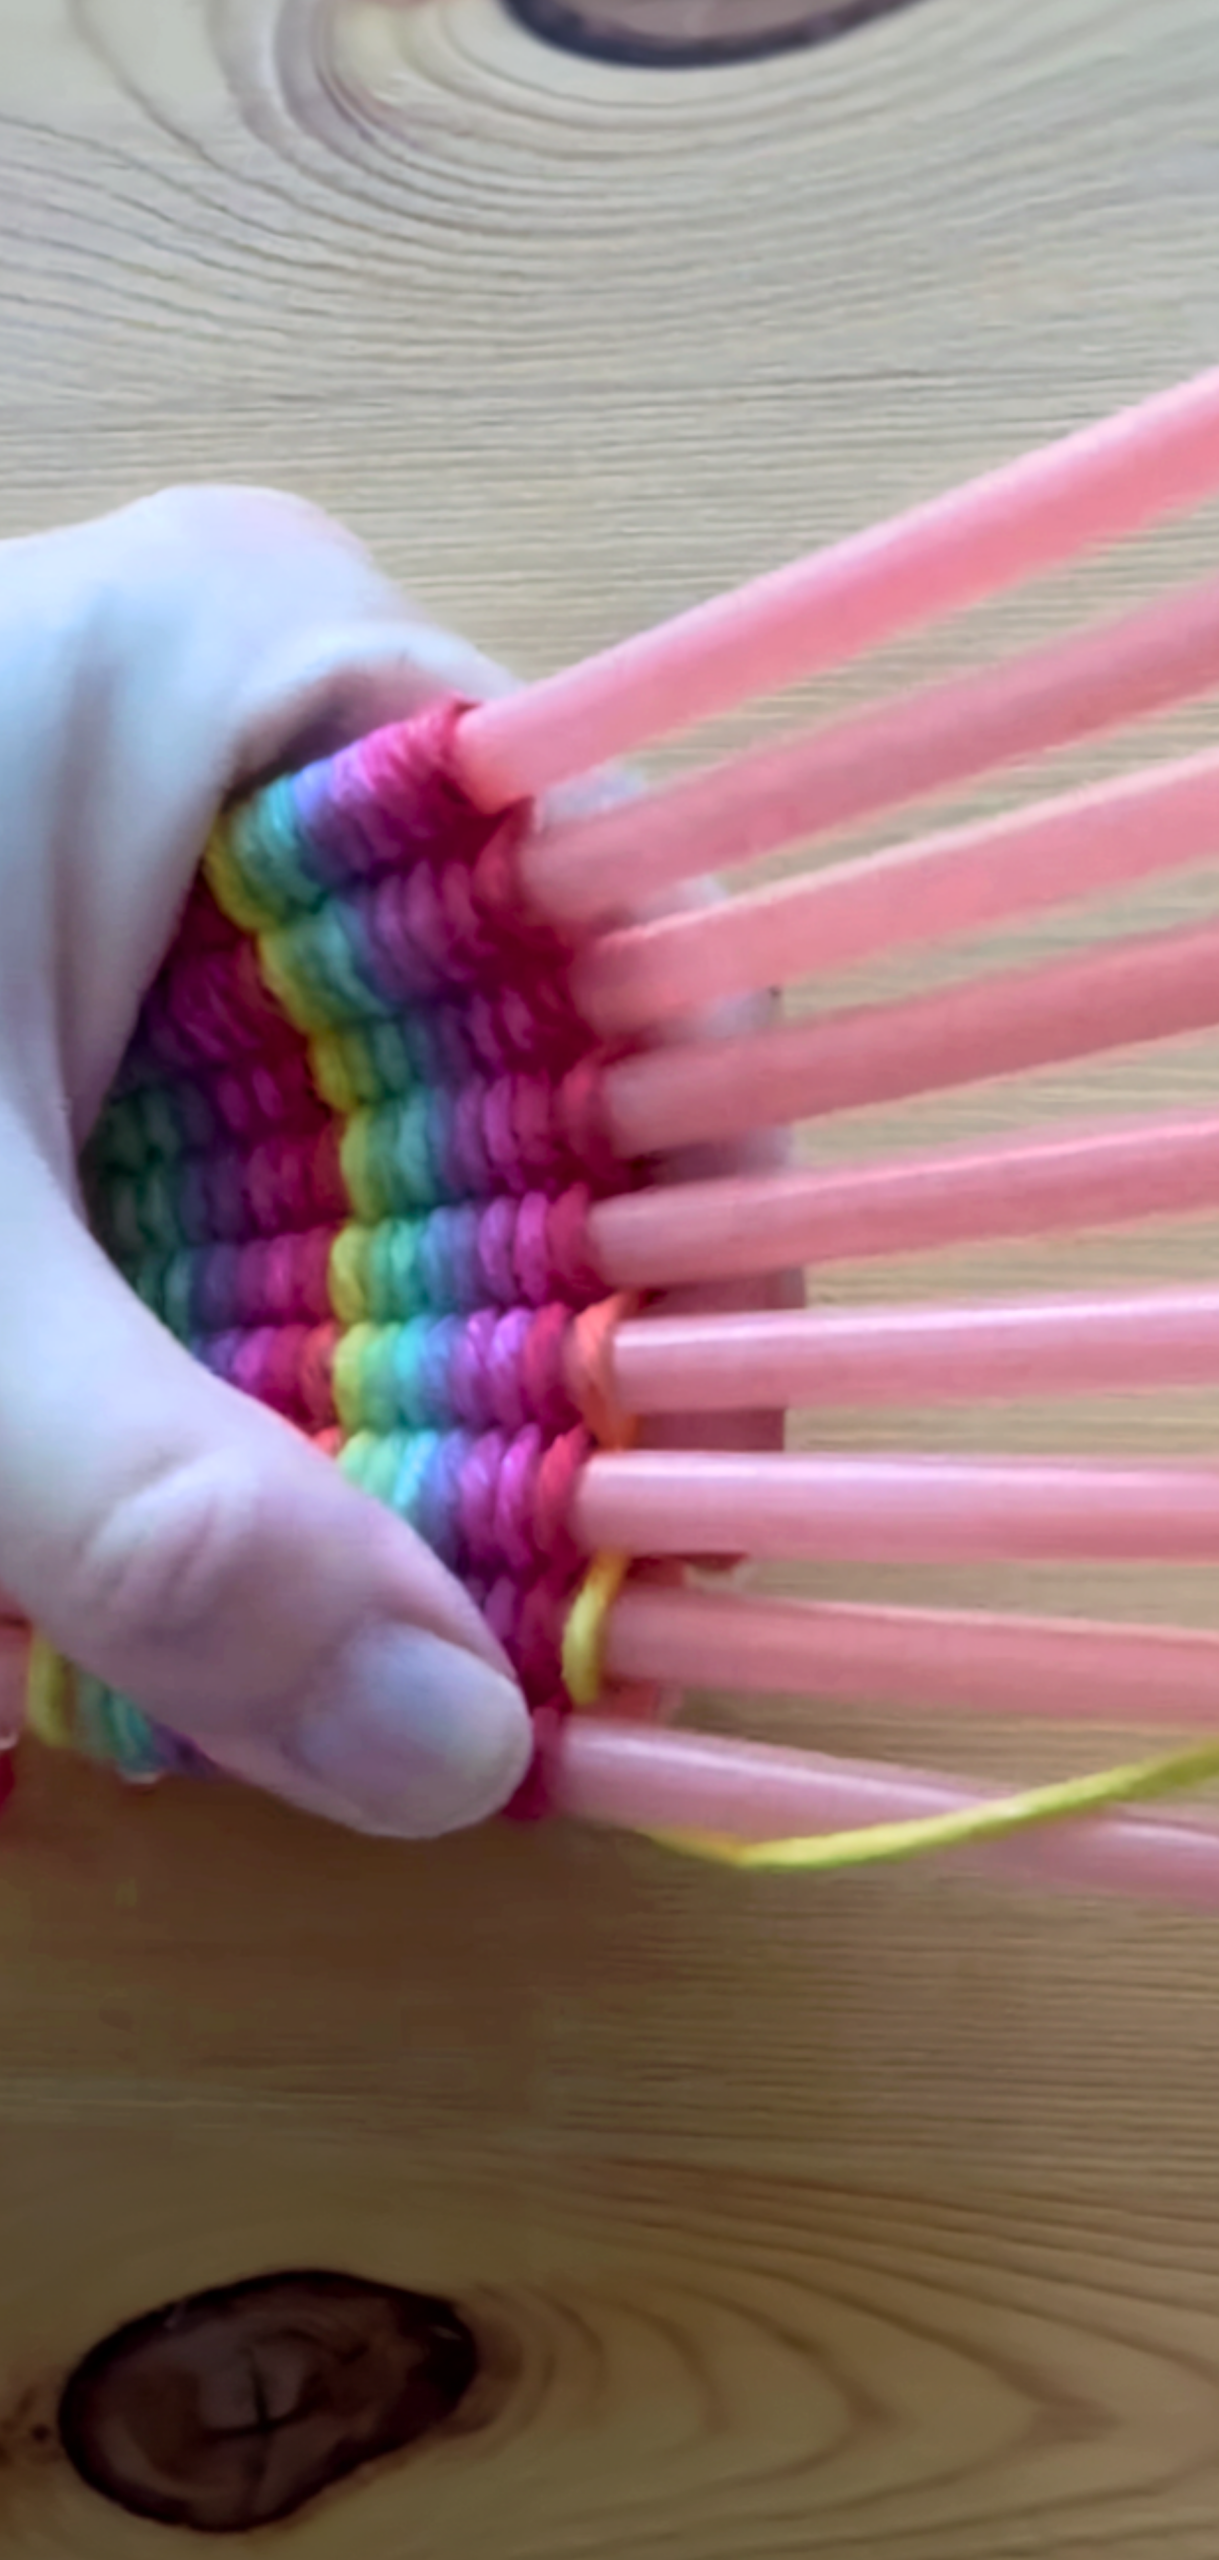
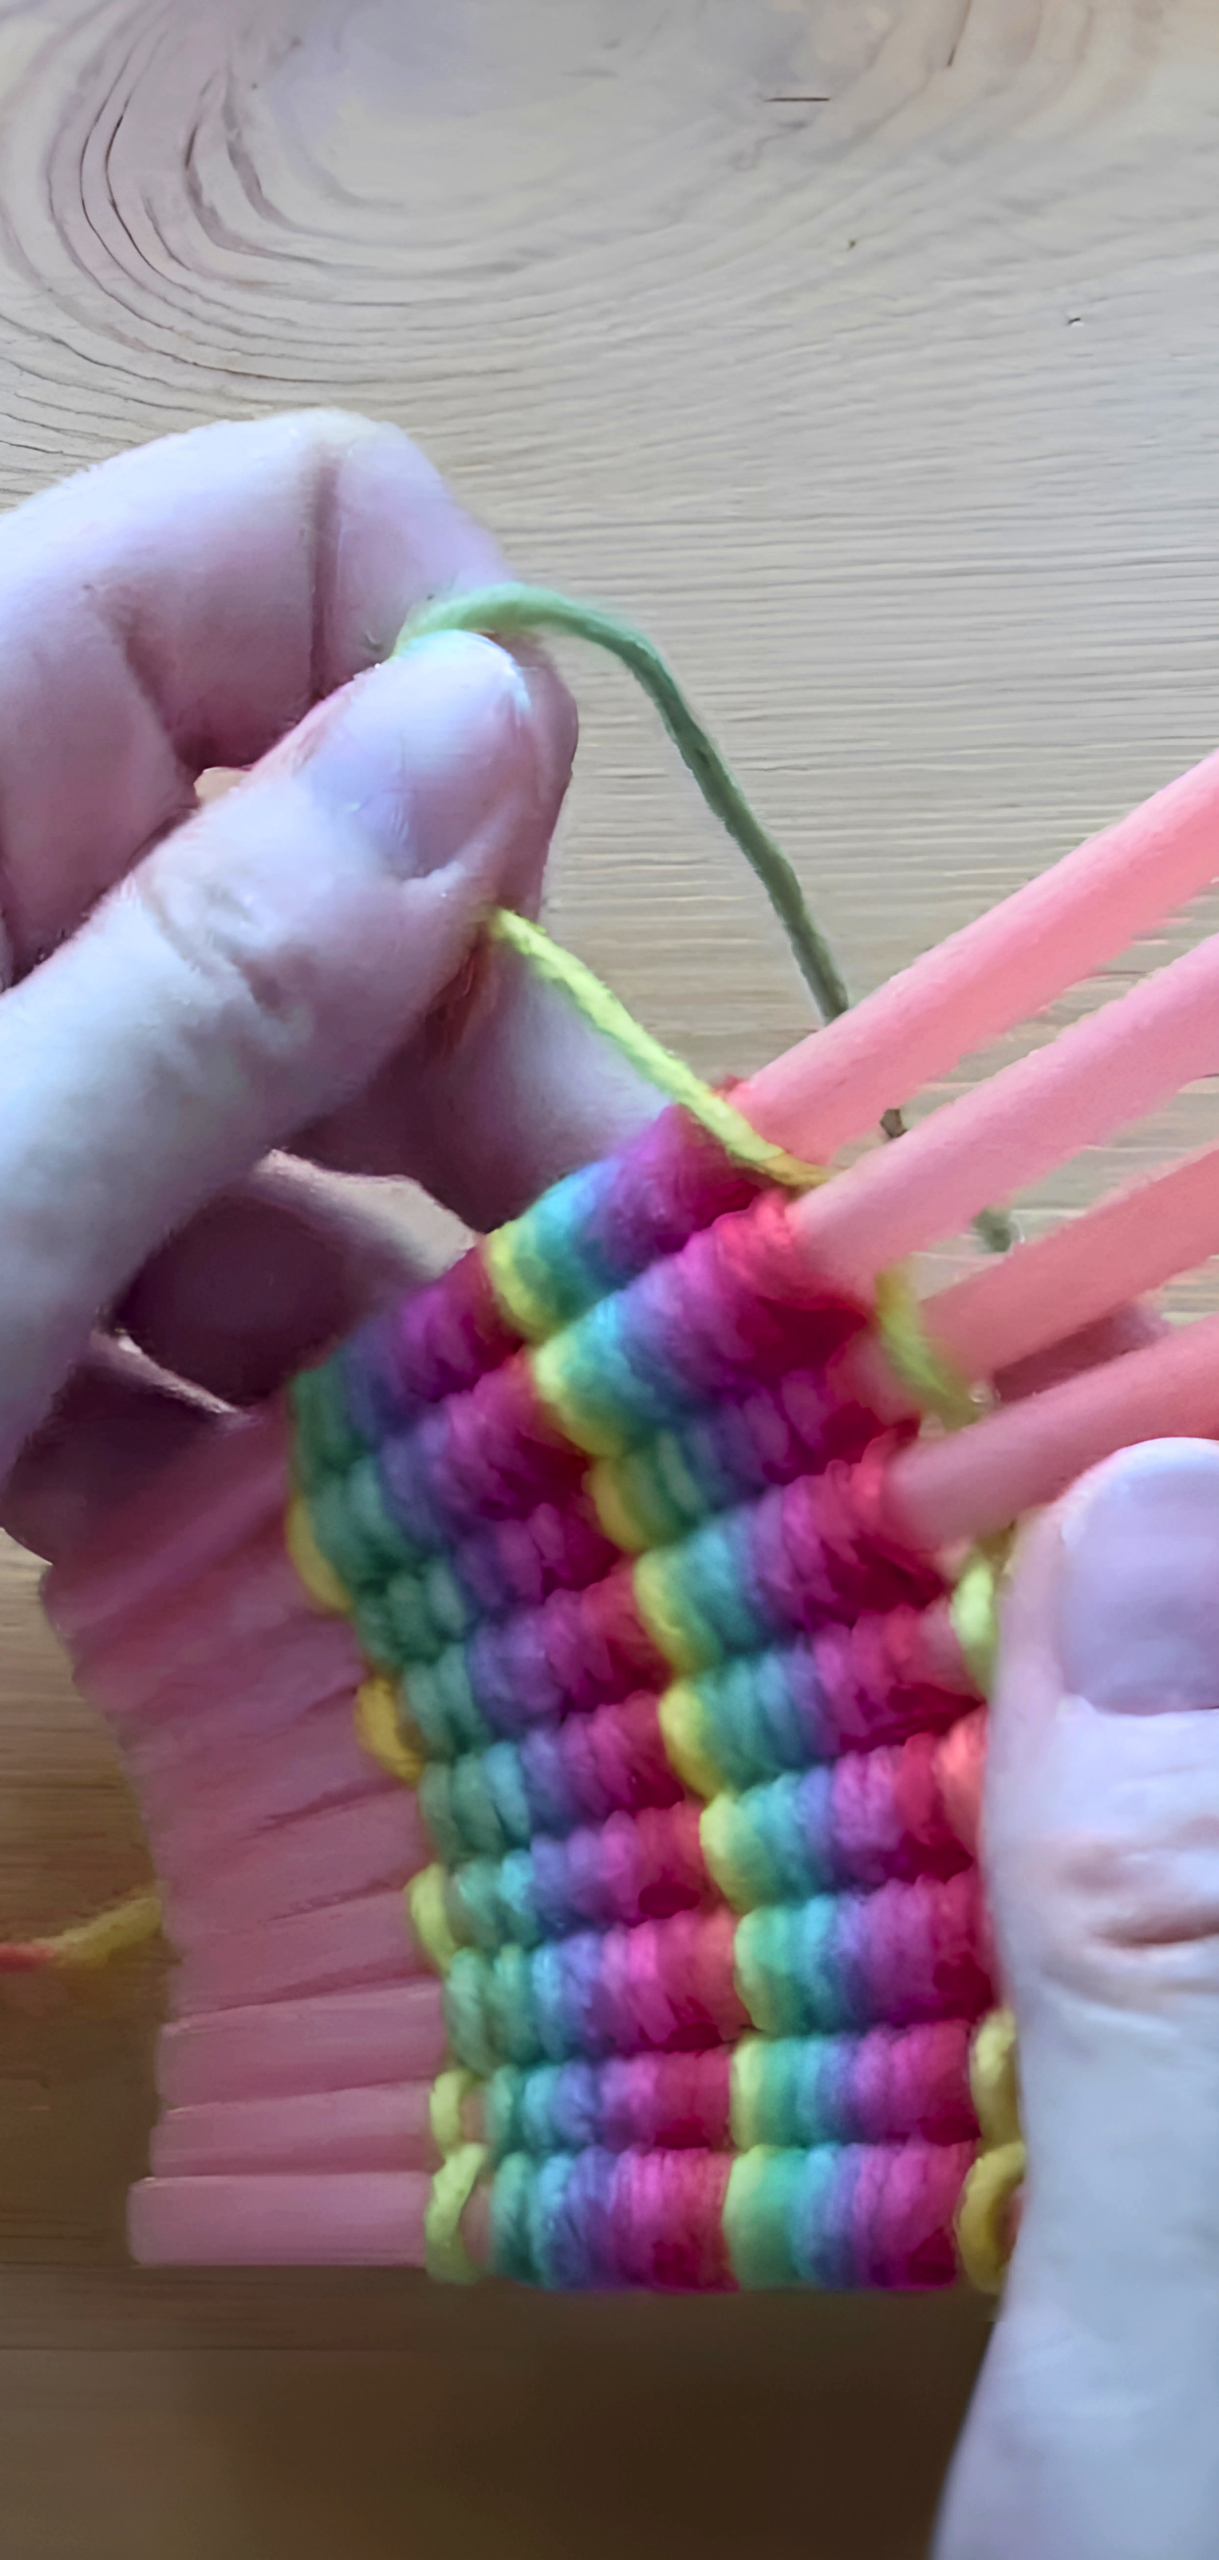
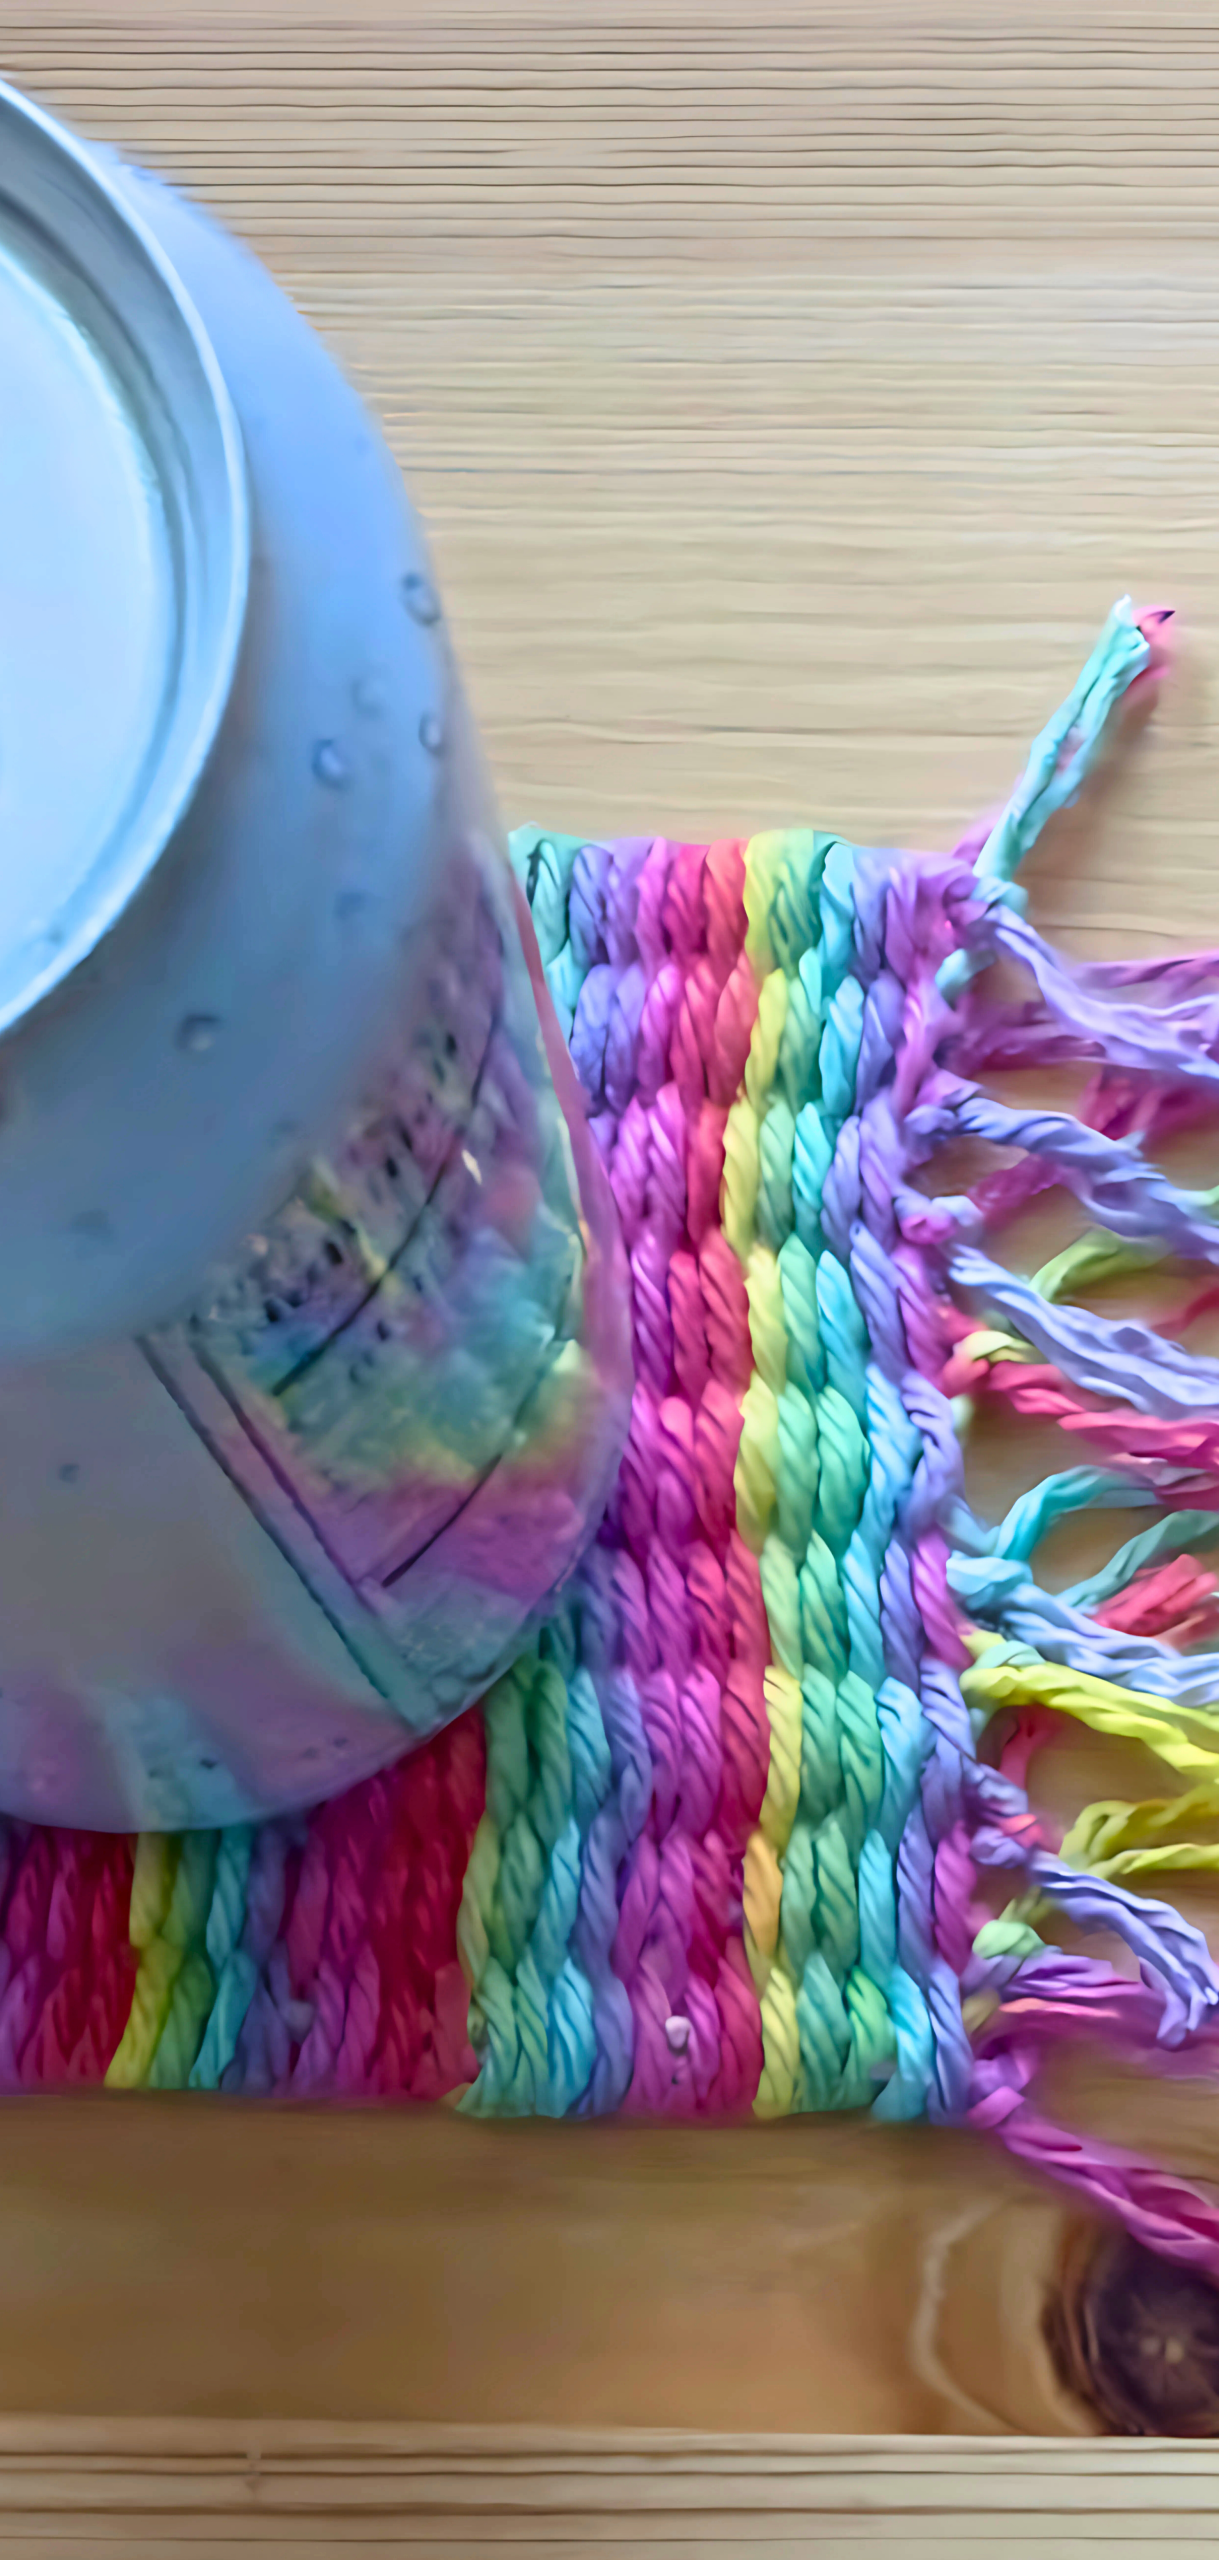
Step 4: Keep Tension and Slide Down Periodically
Every few rows, slide the woven stitches gently downward toward the taped end to keep them snug. This ensures even fabric and prevents silly gaps.
Step 6: Secure & Finish Top End
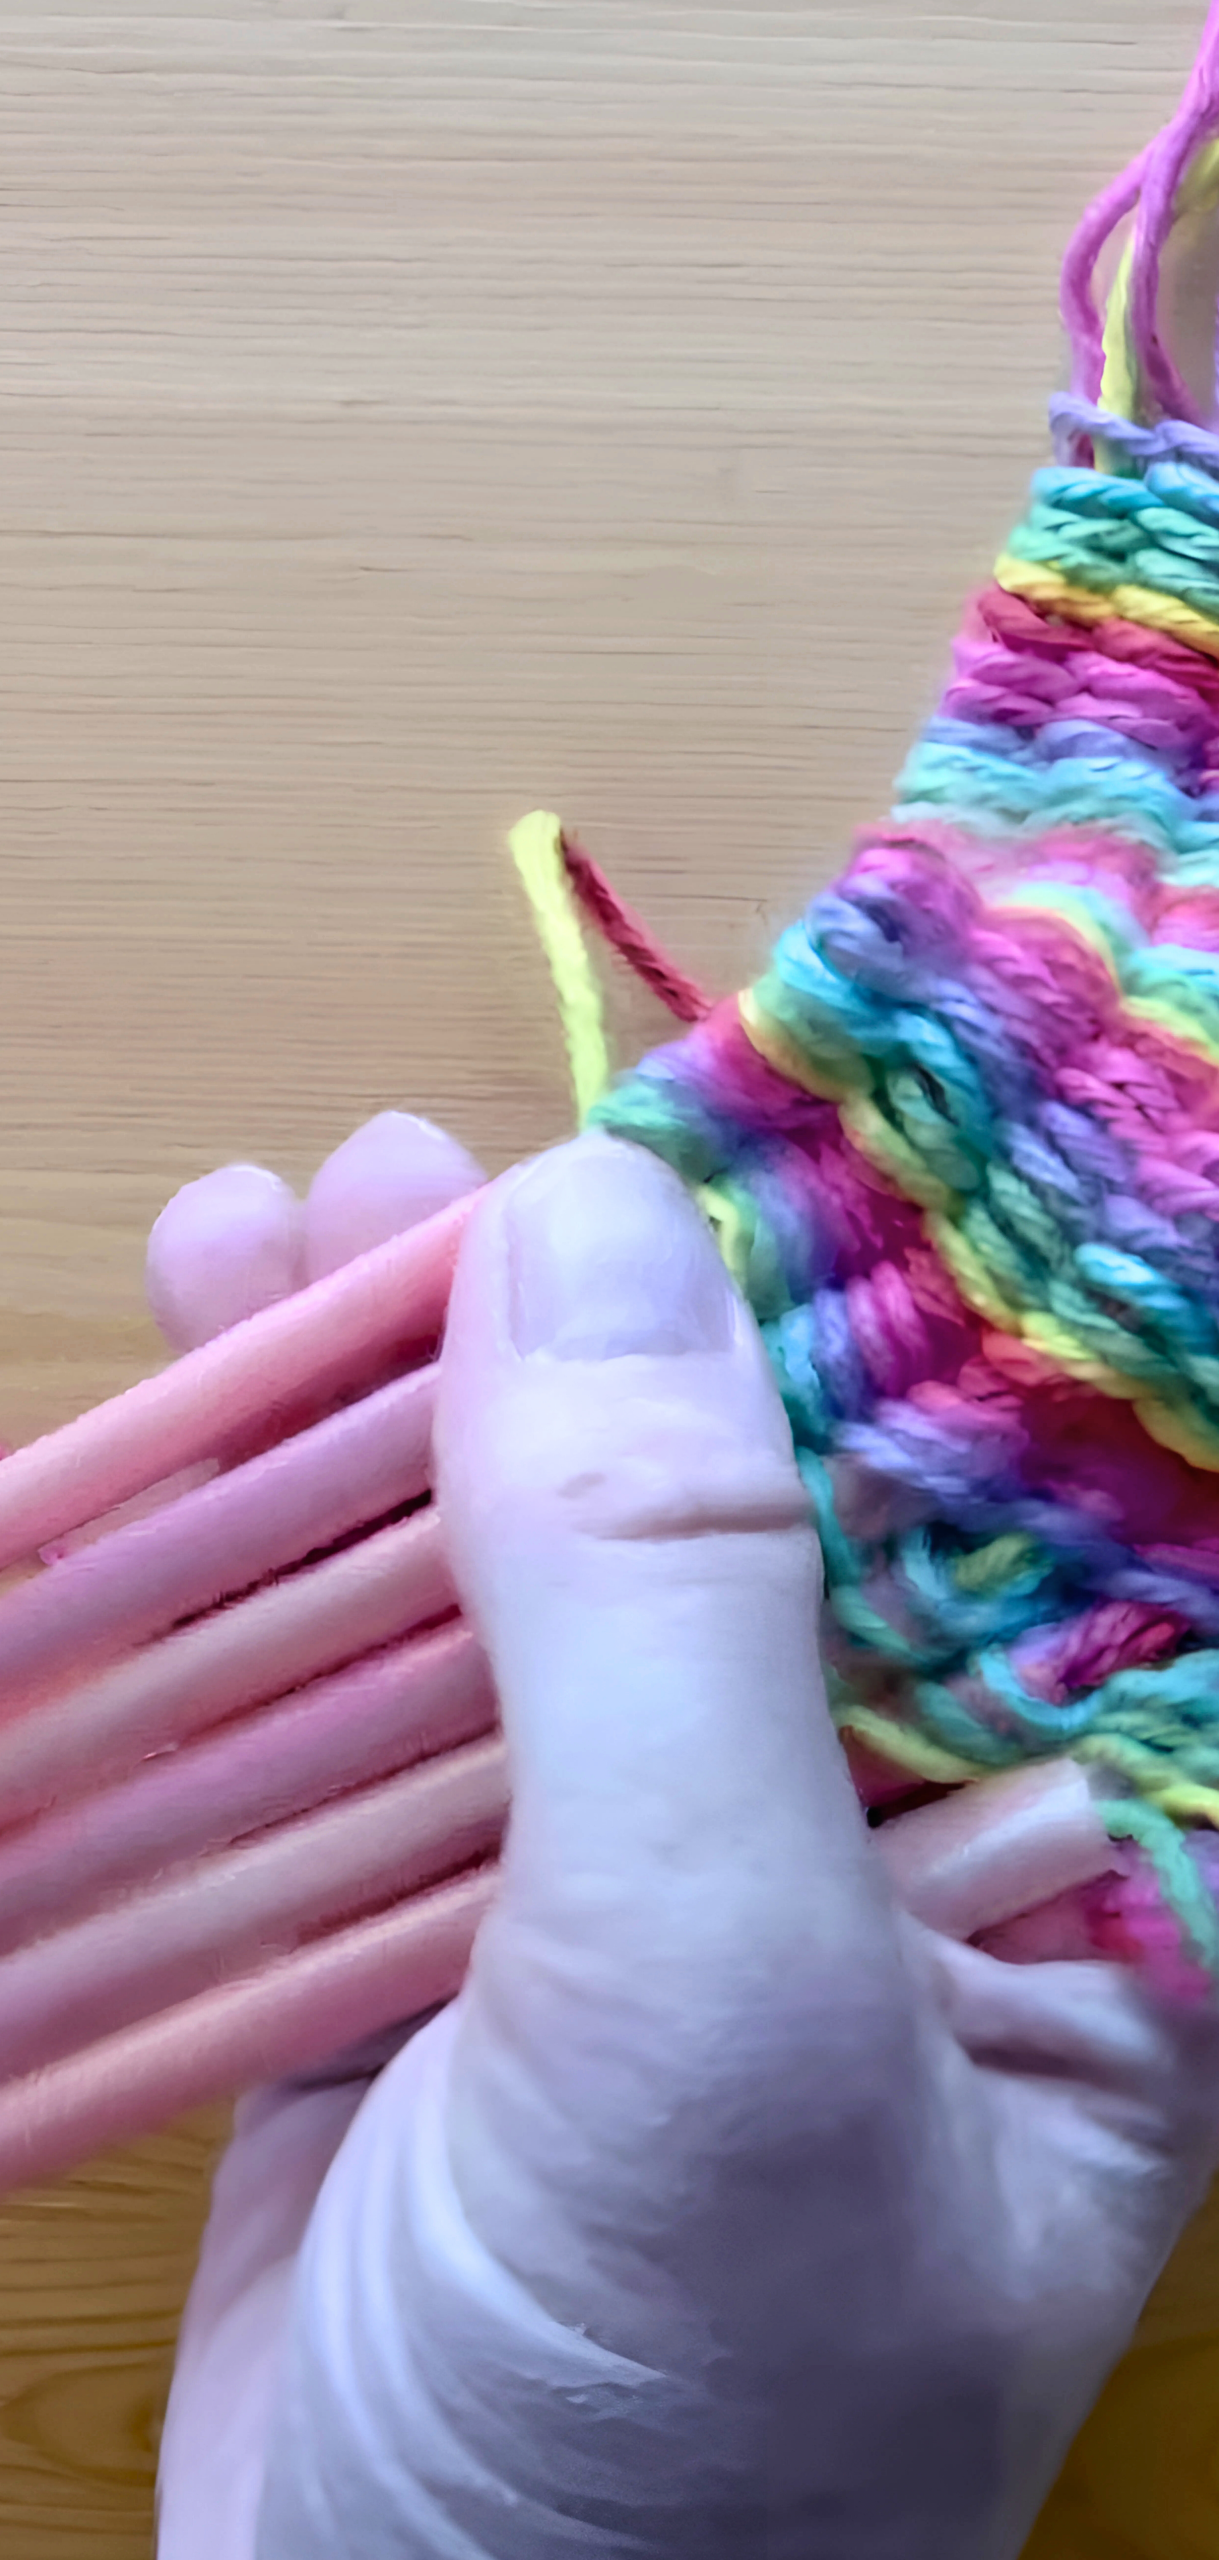
When you’re ready to finish, snip the weaving yarn, leaving a tail. Tie it tightly around one of the warp strands. Remove the tape holding the straws to your work surface, then slide the woven piece off the straws.
Step 7: Tie Off the Tail Ends
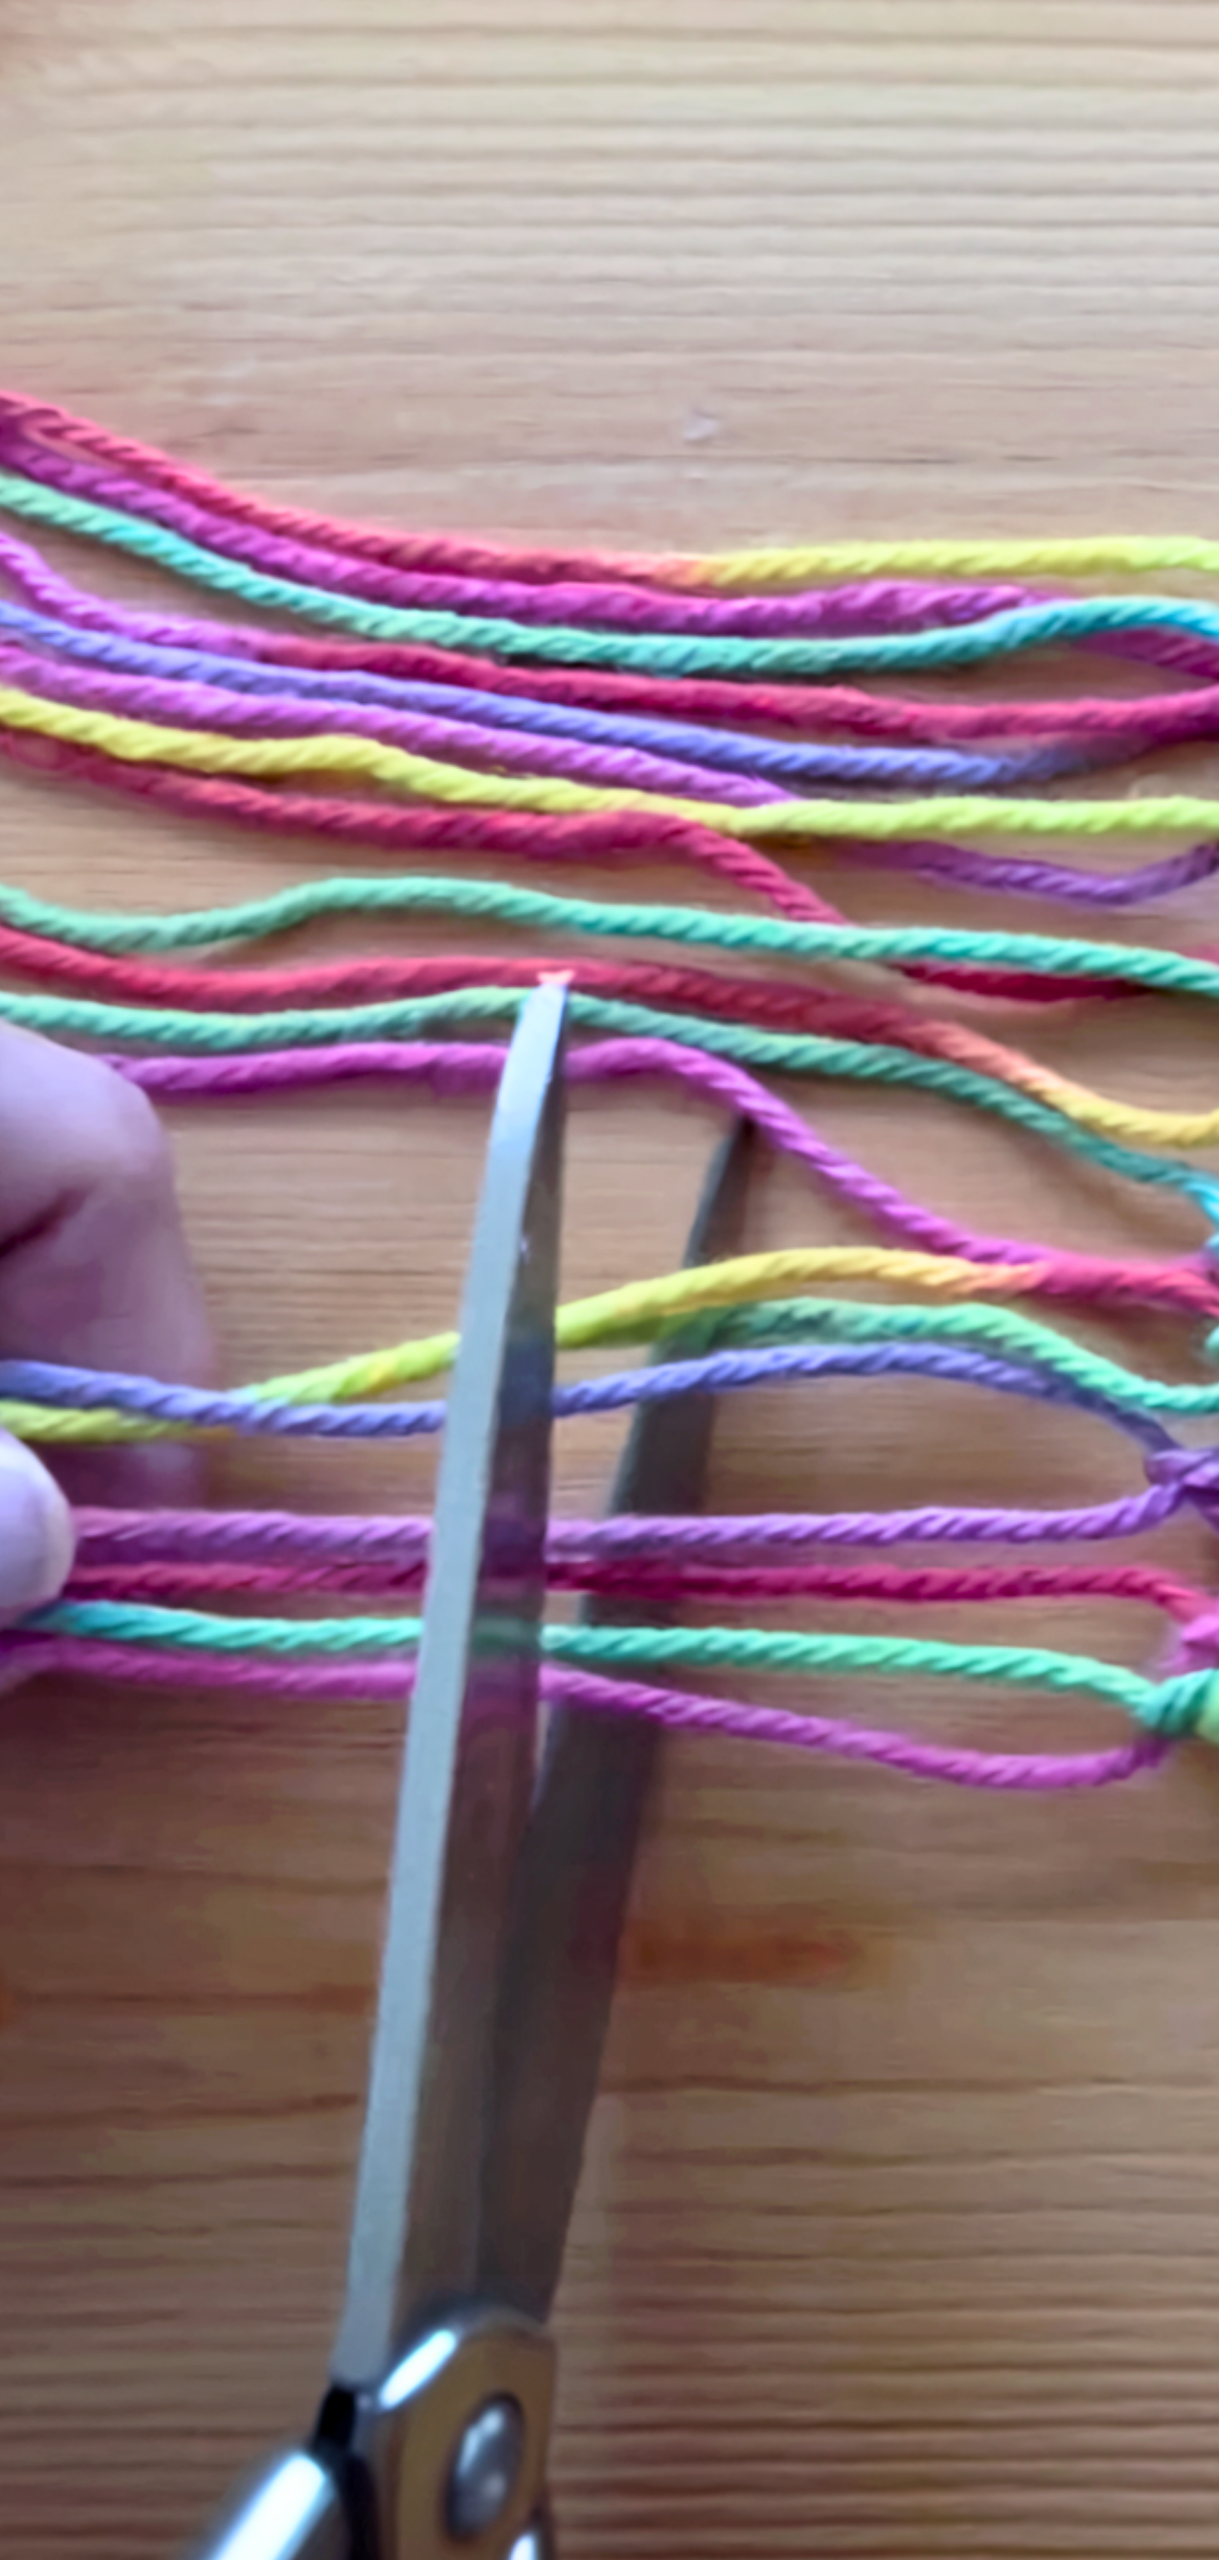
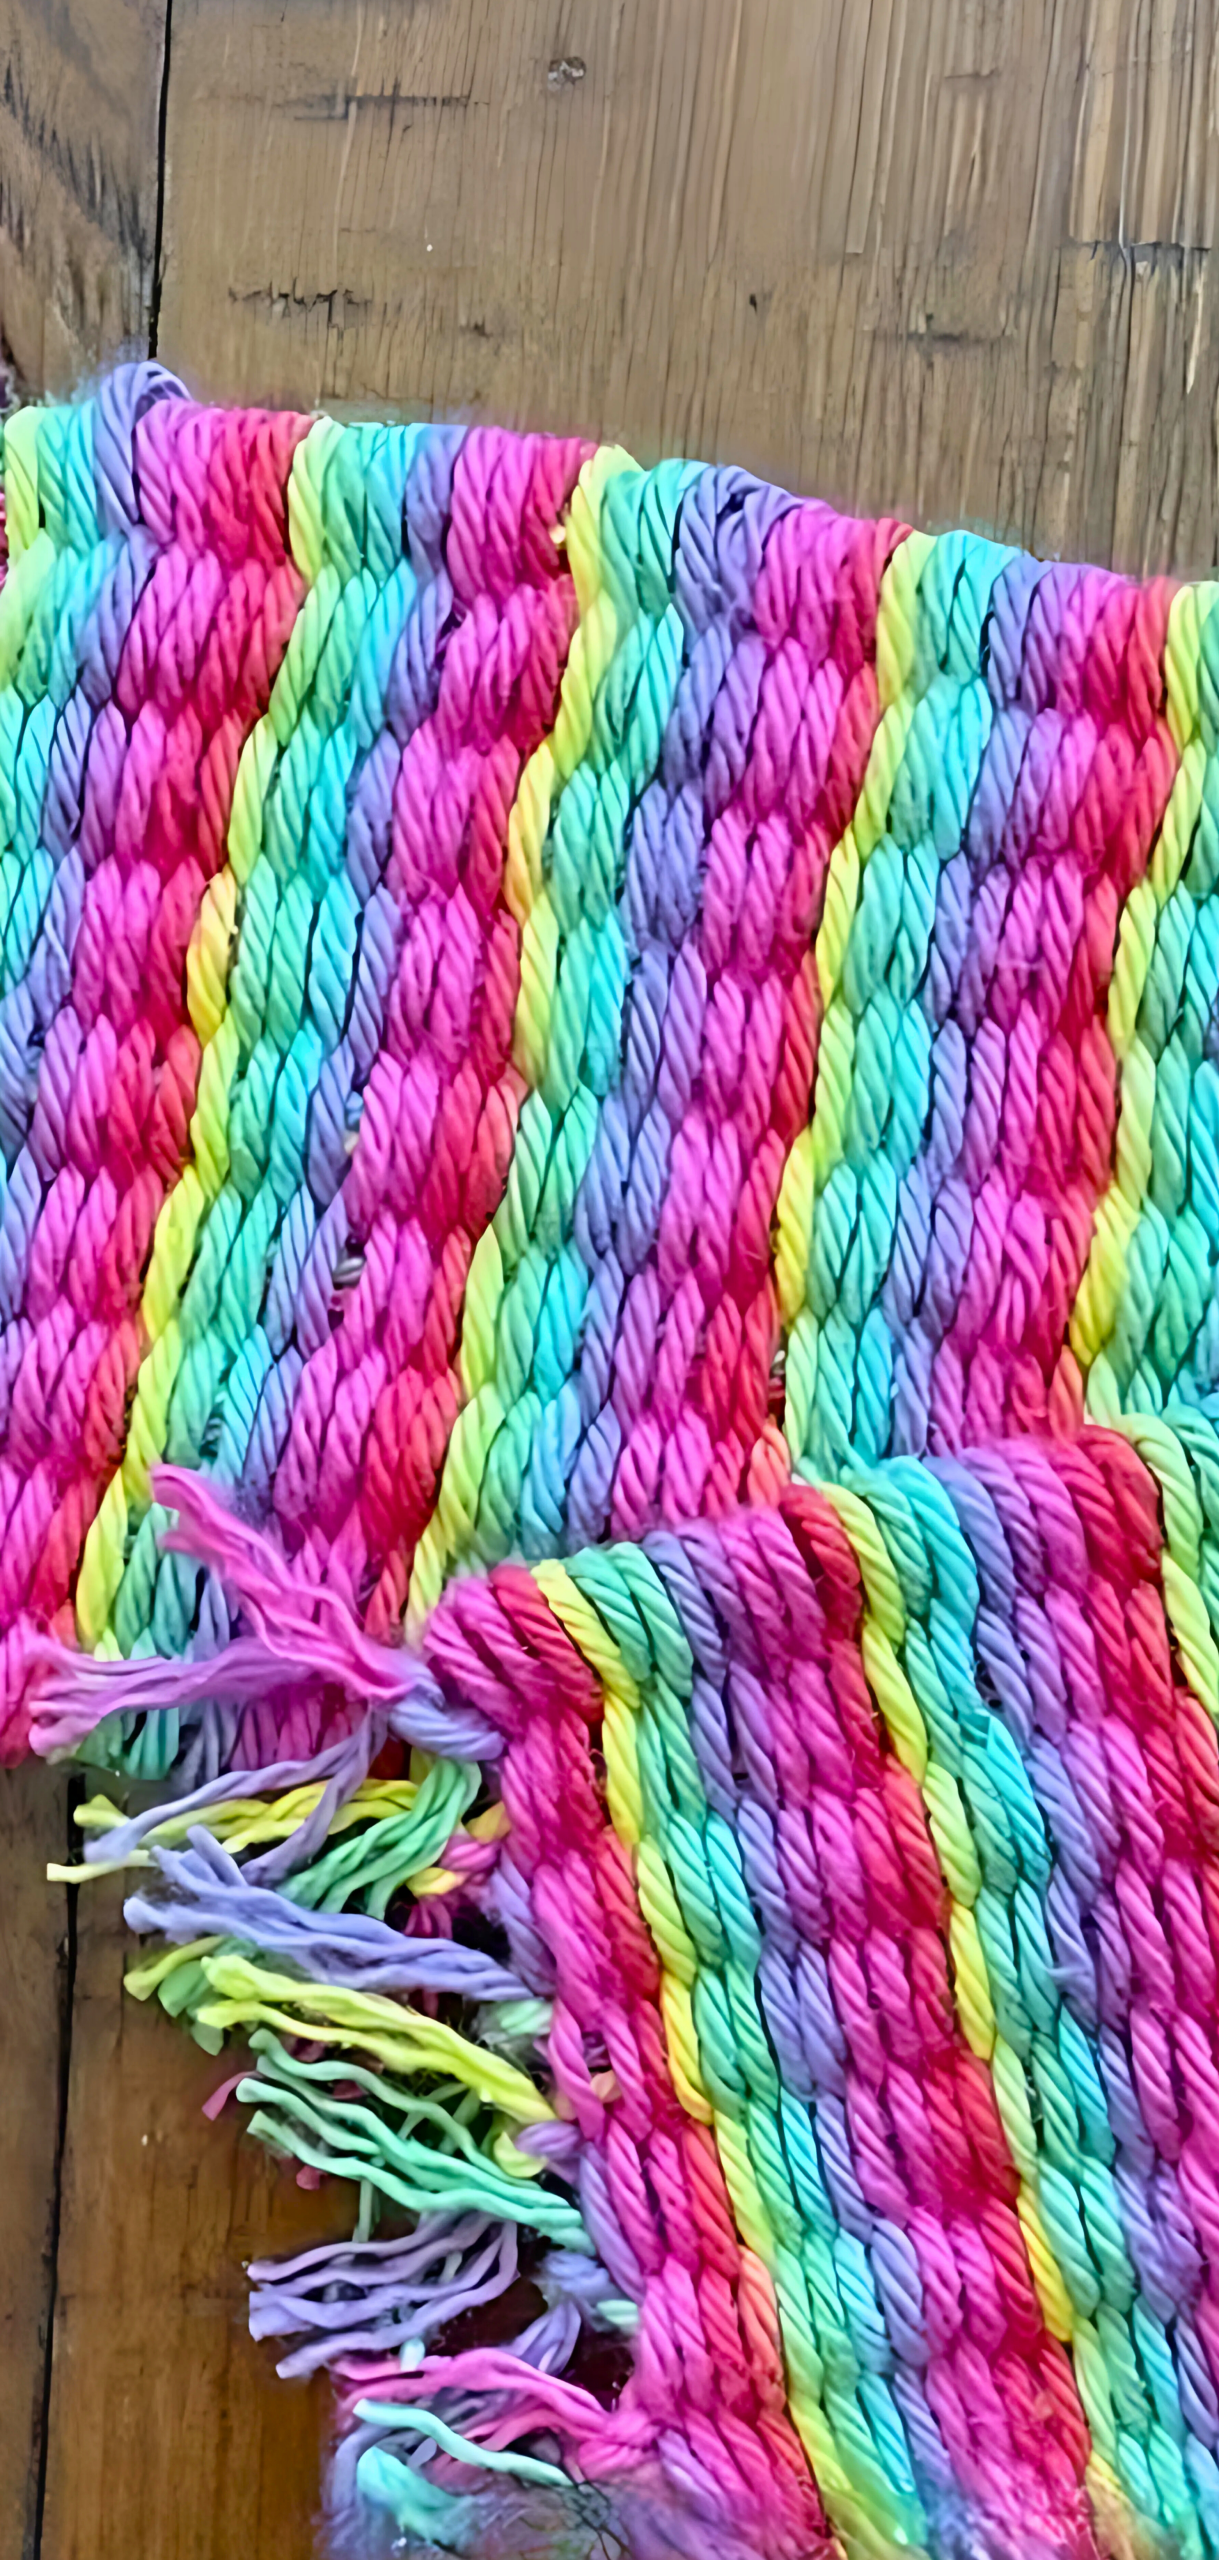
Gather the top ends of the warp and weaving strands and tie them together, close to the woven edge. Repeat at the bottom, and now you have fringed ends or tie them together to make a loop like a bracelet.
Pro Tips
- Use 3 straws for narrow bracelets, or expand to 4–6 straws for wider bands or belts.
- Regularly push your weaving down to keep stitches tight and even. Loose weaving makes fabric uneven.
- If threading yarn through is tricky, use a wooden skewer or knitting needle to help push it through straws.
- This is a great project for tweens and up; adult help with taping and cutting is useful.
FAQs
Can I use more than three straws?
Yes, using 4–6 straws lets you make wider pieces like bookmarks or belts.
How much yarn will I need?
Estimate about 5 yards of weaving yarn per bracelet-style length plus warp strands of similar length.
Can I reuse the loom?
Absolutely.
Is it safe for kids?
Yes, just supervise tape and scissors.
What can I make with it?
Anything you want, like bracelets, or even start wall hangings by weaving panels.
How do I keep the weaving edges from fraying?
Simply tie the warp ends into knots or braid and trim. Then, use fringed ends for decorative style or weave back through loops.
Conclusion
You now have the full know-how to weave stunning bands and accessories using just drinking straws and yarn. This tutorial shows how to assemble a loom, weave with an over-under rhythm, and finish your piece, perfect for fun craft camp projects.